|
|
Connecting a second monitor to an Apple computer is not difficult. The second monitor is connected using a special cable. There are several types of such cables: HDMI– this connector is found on almost all modern video cards. It can transmit both image and sound, while providing high-quality signal transmission. 
DVI- This is the most popular way to connect modern monitors to a computer. Apple uses Mini-DVI for such purposes. It differs from DVI only in its smaller size. 
DisplayPort and Thunderbolt– connectors similar to the HDMI connector. Quite often found on Apple computers. Thunderbolt is an improved version of DisplayPort. At the same time, Thunderbolt monitors can be connected exclusively to Thunderbolt connectors, while DisplayPort monitors can be connected to both DisplayPort and Thunderbolt connectors.  
VGA– a fairly old connector that is practically not used today. It was popular during the use of CRT monitors. If your monitor is connected only through this cable, then in addition to the cable itself, you will also need an adapter for another connection to connect, because Apple products simply do not have this connector.  
To connect a second monitor, you need to purchase the necessary cable and connect it to both the computer and the monitor itself. Comment! If you connect a monitor via VGA or DVI/Mini-DVI, then before the procedure, it is better to turn off the computer; if you connect via HDMI, DisplayPort or Thunderbolt ports, then turning off the computer is not required. Now, in the Apple menu, select the item System Settings – Monitors. 

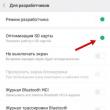
Here you can adjust the screen layout, as well as set the settings for transferring the image to the second screen. By default, when connecting a second monitor, the desktop expands to cover both monitors. In these settings, you can set the image to be duplicated rather than expanded; to do this, check the box next to Enable video repeat of monitors. |
Almost every Mac owner eventually needs to at least occasionally connect to a larger screen. And here a whole series of questions immediately arises - what resolution to choose, through which port to connect, will everything work at 60 Hz? You will find answers to these and other questions in our article.
In contact with
Select resolution: Ultra HD, 4K or 5K
Display resolution is the number of pixels (dots) on the screen in length and width. For example, the well-known expression 1080p means a display with a resolution of 1,920 × 1,080 pixels - 1,920 horizontally and 1,080 vertically. The higher the resolution, the clearer the picture on the screen.
Display technologies are developing very quickly. Today, the most popular resolutions are 1,920 x 1,080 and 2,880 x 1,800. 4K and 5K displays are a big step forward; they contain millions of pixels more than the same-sized screens we are used to today, and, as a result, produce a much more impressive “picture”. Apple coined the marketing term "Retina display" for these ultra-high resolutions.
A true 4K display has a resolution of 4,096 x 2,160 pixels. But most 4K displays that you find in stores have slightly more modest indicators - 3,840 × 2,160 pixels, although they are in no way inferior to the “real” image quality. They are called “Ultra HD” or 2,160 rubles.
The resolution of the 5K display is 5,120 × 2,880 pixels. The pixel density per inch (ppi) of such displays is 7 times higher than Full HD.

Short: Buy an Ultra HD 4K display (3840 x 2160) for your Mac. Retailers offer the maximum selection, and their prices are the lowest possible: basic models can be found even for less than 20,000 rubles. However, their resolution will still be 4K, and you will notice the difference between it and Full HD immediately.
Ports: Thunderbolt vs. HDMI
4K and 5K displays connect to Mac via Thunderbolt or HDMI
Thunderbolt
Thunderbolt ports on 2011 and newer Macs support Mini DisplayPort, a popular technology for connecting external displays. A monitor with a “regular” DisplayPort can also be connected to a Mac computer - via a special DisplayPort - Mini DisplayPort cable (the price is around 1,000 rubles).

Most Macs released between 2011 and 2013 use the first generation of Thunderbolt. It supports DisplayPort 1.1a - which means these Macs don't have the specs to handle a 4K or 5K display at 60Hz.
Reference: The display refresh rate is the number of maximum possible updates of the entire image on the screen per second. It is measured in hertz (Hz). There are three common frequencies - 60 Hz, 30 Hz and 24 Hz.
Of course, the only acceptable option is 60 Hz. At a frequency of 30 Hz and even more so at 24 Hz, the user is faced with a noticeable decrease in performance and lags when simply moving the mouse.
Via Thunderbolt, Macs support refresh rates of up to 60 Hz, and via HDMI - 30 or 24 Hz (due to limitations of HDMI 1.4). MacBook 2015 and newer, MacBook Pro 2016 and newer, iMac 2017 and newer, iMac Pro received HDMI 2.0 standard and support 60 Hz - provided that the connected monitor also supports it, there is an HDMI Premium cable and a USB-C adapter / HDMI 2.0 from a third party.
In 2013, Apple introduced the Thunderbolt 2 standard with support for DisplayPort 1.2. As a result, the maximum video stream throughput has doubled - from 8.64 Gbit/s to 17.27 Gbit/s. This is quite enough to “drive” additional millions of pixels from 4K or 5K.
Thunderbolt 2 is supported by Macs released in late 2013 and later.
Important: Check out the information about SST and MST monitors below!
- MacBook Pro (Retina, late 2013 and newer models);
- Mac Pro (late 2013);
- iMac (Retina 5K, 27-inch, Late 2014 and newer);
- iMac (Retina 4K, 21.5 inches, late 2015 and newer models);
- iMac (21.5-inch, late 2015 and newer models);
- Mac mini (late 2014);
- MacBook Air (early 2015);
- MacBook (Retina, 12 inches, early 2015 and newer models);
In June 2015, Intel introduced Thunderbolt 3 with a USB Type-C connector.

It replaced Mini DisplayPort, the data transfer speed - over two channels - was increased to 40 Gbit/s. However, Thunderbolt 3 is still based on DisplayPort 1.2. Apple has added support for the new standard in the MacBook Pro (2016 and later models), iMac (2017 and later), and iMac Pro. It allows you to connect up to three (!) 4K monitors or one 5K monitor at 60 Hz to compatible devices.

SST or MST?
The creators of the first 4K displays with a resolution of 60 Hz used Multi-Stream Transport (MST) technology. It programmatically “stitches” two parts of the display into a single whole (“tile”). MST is supported on Macs with Thunderbolt 2 and allows you to send a signal to two or more monitors through a single cable, which was convenient for those who need to work across multiple 4K monitors.
The following Mac computers support MST displays in 60Hz mode:
- MacBook Pro (Retina, 15-inch, Late 2013) and later;
- Mac Pro (Late 2013);
- iMac Pro (2017).
More modern 4K displays use Single-Stream Transport (SST), where there is no longer a need to programmatically combine displays into one - SST monitors immediately scale 4K resolution at a frequency of 60 Hz onto one “tile”. When purchasing, it is better to choose an SST monitor, as MST has problems when working with in-game menus, the BIOS screen and scaling.
With OS X Yosemite 10.10.3 and later, most 4K (3840 x 2160) SST displays support a 60Hz refresh rate on the following Macs:
- MacBook Pro (Retina 13-inch, Early 2015) and later;
- MacBook Pro (15-inch Retina, Mid 2014) and later;
- Mac Pro (Late 2013);
- iMac (27-inch, Late 2013) and later;
- MacBook Air (early 2015);
- iMac Pro (2017).
With OS X Yosemite 10.10.3 and later, most 4K (4096 x 2160) SST displays support a 60Hz refresh rate on the following Macs:
- MacBook Pro (2016 and later);
- Mac Pro (Late 2013);
- iMac (Retina 5K, 27-inch, Late 2014) and later;
- iMac Pro (2017).
With macOS Sierra, MacBook (2015 and later models) supports 4K (3840 x 2160) displays at 60 Hz when connected via DisplayPort.
Macs with Thunderbolt 2 can also connect multiple 4K displays via daisy-chaining. Connection requires a Thunderbolt cable (to each device), DisplayPort input and output on each monitor, support for DisplayPort 1.2 technology on both the Mac and on all monitors except the last link in the chain (version 1.1 is sufficient there). The length of the chain of daisy-chained monitors is determined by the Mac's graphics card.

For many, the priority question is whether it is possible to connect an additional monitor to iMac computers. In fact, it is possible to connect additional displays for video playback and other purposes. Also possible:
- configure your computer so that either the same image is used on two monitors, or a different one;
- distribute programs across different monitors to save space;
- use the monitor as an enclosed display.
Preparatory work for connecting an additional monitor to the iMac
- First of all, you should make sure whether there is a need for an adapter and what ports are available on your device.
- In addition, you should check how many monitors can be used. To complete this procedure, you will need to go to the “About This Mac” section, then go to the “Support” section and click on the “Specifications” button. This will open a web page containing all the information regarding monitor support.
Photo: iMac Support section How to use Desktop Extend Mode on iMac?
It is worth noting that thanks to this function you have the opportunity to use two workspaces at the same time. In order to wisely use the resulting space, you will need to use the Mission Control program.
If a specialized Dock panel is located at the bottom of the screen, it can be displayed on any connected monitor. To do this, you just need to hover your mouse cursor over it.
How to enable desktop extension mode?
- The first thing you'll need to do is connect a secondary display to your Mac device.
- Then in system settings you need to select monitors.
- Next, click on the “Location” link.
- You need to look to see if there is a checkmark on the video repeat of the monitors. If it is standing, then it needs to be removed.

How do I change the monitor layout as well as the primary display on iMac?
In order for you to be able to move applications and use windows on different monitors, you will need to arrange the displays in the order in which they are located on your desk. It's worth noting that all icons appear on the main monitor.

Last week we looked at . Regions offers a virtual method for adding multiple desktops without physically using multiple monitors.
While? Just as Scopes improve the experience and productivity for Mac users, sometimes adding an extra physical monitor is the only way to get things done. I've been using a second monitor for almost two years and I couldn't imagine a better option for my work.
Connecting a second or third monitor to your Mac is something you can do yourself with a little time to set up. It's important to note that some Macs are limited to connecting only one external monitor (MacBook Air, for example), while others can support two or more. The easiest way to find out how many monitors you can connect to your Mac is to visit Apple's specifications page for your Mac model. Visit this page, search for and select Mac, and then look under the "Monitor Support" heading for the number of external monitors supported.
Choosing a monitor for your Mac.
When you're shopping for a monitor, pay attention to the type of connector that comes with the monitor. Most monitors include either a VGA or DVI connector. If at all possible, it's best to avoid using VGA as it has less than ideal image quality. Also, if you like a monitor that has an HDMI port, don't avoid it (even if your Mac doesn't have an HDMI port itself). Since Apple has long since abandoned both connection types, you'll need to purchase an appropriate Mini DisplayPort adapter (i.e. Mini DisplayPort-to-VGA, Mini DisplayPort-to-HDMI, or Mini DisplayPort-to-DVI). The adapter converts the signal coming from the monitor, making it compatible with your Mac. Don't worry if you own a newer Mac with a Thunderbolt port - it's even better.
The adapter is not very expensive. For those who prefer to receive accessories directly from the developer, you can find them in the Apple Store. Some users report that official adapters are more reliable, but I've had good luck with third-party adapters.
Or, if you're a fan of Apple's Thunderbolt Display, it has a special cable for connecting directly to your Mac, although the computer must be Thunderbolt-compatible (and you'll have to fork out $999 to purchase one).
Display layout.
Once you've purchased all the necessary parts, connect your monitor, turn it on, and connect it to your Mac's Thunderbolt port or Mini DisplayPort. At this point, make sure you are logged into your computer and both screens are turned on. Once connected, your Mac will automatically start showing the same image on the new monitor as on the main one. If you are not currently showing a presentation, such a display is not all that can be done, you need to go to "System Preferences> Displays> Layout".

In the setup window, you will see that both displays are superimposed to show the same image. To disable image copying, uncheck the box just below the preview window that says “Sync monitors.” Both displays will go dark for a brief moment. When they turn on, you will see two different desktops, but the Menu and Dock will only be visible on one. OS X will automatically detect the ideal resolution for both screens, but if you want to change this setting, you can do so by selecting the Monitor tab in the Monitor settings panel.
In the "Arrangement" window, you can move and adjust the position of the monitors so that they appear as they are actually located on the table. Keep in mind, this will also determine which side of the screen you move your mouse to to switch between displays. As long as the displays are touching in the arrangement window, you can place the second monitor relative to the main one as you wish: top, bottom, right, left - it doesn’t matter.

As mentioned above, the menu bar and Dock are only present on one display (technically the menu bar is present on the secondary display too, but it's almost completely transparent), making it the main screen. From the same settings panel, you can drag the white bar representing the menu bar onto the screen you want to set as your primary screen. Again, the displays will go dark but will come back on to show the new settings. iMac as a second display.
Do you have an unused iMac lying around the house? Did you know you can use it as a second monitor for your MacBook? All you need is a Mini DisplayPort or Thunderbolt-compatible MacBook, iMac and the appropriate cable to connect them. The cable will need to be plugged into the Mini DisplayPort or Thunderbolt port on your MacBook and then back into the corresponding port on the iMac. Apple has published a list of Macs and their corresponding cable requirements. Once connected, log into both devices and then press the Command and F2 keys simultaneously to activate what's called "External Display Mode" on the iMac.
Your MacBook will see your iMac as another monitor, and you can use it however you want.
A month ago, it contains compared to its predecessor, but today I would like to draw attention to one of them. At the operating system presentation at WWDC in June of this year, Craig Federighi announced improved support for multiple screens in Mavericks, and a couple of days ago I was able to put his words to the test.
Using a regular HDMI cable (not ) I connected my MacBook to an external 27-inch monitor. At first, no major improvements were noticed: the image appeared very quickly, and then the monitor duplicated the image from the laptop. There is nothing surprising in this; a similar “trick” can be pulled off by Windows computers.
However, an active AirPlay icon immediately appeared on the top bar of Mavericks. Clicking it revealed the option to turn off the monitor's video repeat and ended up with almost two computers instead of one.

The laptop display and the external monitor turned out to be independent of each other, but at the same time they did not lose connection. The Dock can be used on only one of the screens by moving the cursor to the bottom edge of the monitor. At the same time, you can run different applications on two monitors - for example, watch a full-screen movie on a laptop and simultaneously open an email client on an external display. Very comfortably.
But the most interesting thing is that monitors can “communicate” with each other. To move the window of a running application from the laptop to the monitor, you just need to pull it in the direction where the external display is located. As the program begins to disappear from the laptop screen, it will appear on another monitor. It is noteworthy that the application will be automatically optimized for the new resolution.
The new feature works especially impressively with the Mac Pro. supports up to six simultaneously connected displays, which will turn you almost into Tony Stark. The user can “stretch” the same Safari over the entire workspace (I don’t know why this is needed, though), and also control each monitor as if it were a whole separate computer.
So the next time you connect your Mac to an external monitor, don't close the laptop's lid. Make the most of your workspace.