Sections of the site
Editor's Choice:
- Color music on arduino Color music on the avr microcontroller
- Setting up a VPN connection using Windows OS
- What to do if your Mac gets hot on Windows Cool down your MacBook on Windows
- Your Mac will start to slow down wildly, but this can be avoided
- What are the features of the game on the European Archeage server?
- Nokia Lumia 630 ds. hit business smartphone. Communications
- How to programmatically open external processing?
- A Guide to Systems for Creating Installers
- ESET NOD32 Antivirus free download Russian version
- Picmonkey - fast online photo editor Frames
Advertising
| Cryptopro key set is not defined. Incorrect key set parameter when creating ep on the server side |
|
Good afternoon friends! Last week one of our visitors contacted us with strange problem. A user says: when trying to install any application in Windows 8.1preinstalled on the laptop, it has an error occurred - n incorrect registered key set. Moreover, he tried to install the most common programs, for example iTunes, various games, such as Sims, Need For Speed and so on. In most cases, an error occurred during installation incorrect registered key set and distribution, (installer) was finishing his work. Sometimes there was an error0x80070643, instead of that, for example, when installing a component Microsoft Visual C++. When I tried to google information on the Internet, I could not solve the problem. Most of the links lead to forums where problems related to crypto applications, such as crypto-pro, are discussed. But that’s not the point here, no programs were used. Invalid registered key set, error code 0x80070643. What did you find?
.Net framework cleanup tool
But unfortunately the effect did not happen either.
Solution to the problem:
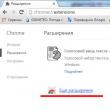
We really hope that this article will help many people solve the problem (Incorrect registered key set, 0x80070643) with Windows 8.1 without reinstalling. If you have any questions, please ask them in the comments. Creation electronic signature on the 1C platform using CIPF CryptoPro CSP can be executed both on the server side and on the client side. In both cases, a rather nasty error may appear: Unpleasant this error because it has many causes, and in order to correct it, you need to carry out a whole range of measures. Formulation of the problemLet's say there is information base, with which the 1C platform works in a client-server version. We will create an electronic signature on the server side; in this case, it is recommended to use certificates and keys located in the storage local computer, since they will be available to anyone Windows user. And there is also installed certificate in the local computer storage in the Personal section (see Figure 1) with a link to the private key (see Figure 2).When creating an electronic signature, an exceptional error occurs indicating that the key set parameter is incorrect. SolutionCreating an ES on the server side means that this operation will be executed as a 1C server user (USR1CV82 or USR1CV83, depending on the platform version). One of the reasons for the incorrect key set parameter error to appear is that the user does not have access to the private key of the certificate.To give the user the necessary rights to work with the private key of the certificate, open the snap-in Certificates(connects automatically when installing CryptoPro CSP) and find the certificate that is used to create the electronic signature. Right-click on it and select All tasks -> Management private keys
(see Figure 3). Thank you very much, Mikhail, everything was done quickly and most importantly it was clear to me... Since we found it with you mutual language. I would like to continue to communicate with you in the future. I hope for fruitful cooperation. Olesya Mikhailovna - General Director LLC "VKS" On behalf of the State Unitary Enterprise "Sevastopol Aviation Enterprise" we express our gratitude for the professionalism and efficiency of your company! We wish your company further prosperity! Guskova Liliya Ivanovna - manager. State Unitary Enterprise "SAP" Thank you, Mikhail, very much for your help with the design. Very qualified employee +5! Nadiya Shamilyevna - entrepreneur IP Anoshkina On behalf of the AKB-Auto company and on my own behalf, I express gratitude to you and all employees of your company for the productive and quality work, sensitive attitude to client requirements and efficiency in the execution of ordered work. Nasibullina Alfira - Senior Manager"AKB-Auto" I would like to thank consultant Mikhail for great job, timely and complete consultations. He is very attentive to the client’s problems and questions, promptly solving the most difficult situations for me. It's a pleasure to work with Mikhail!!! Now I will recommend your company to my clients and friends. And the technical support consultants are also very polite, attentive, and helped with the difficult installation of the key. Thank you!!! Olga Sevostyanova. Purchasing the key turned out to be very easy and even pleasant. Many thanks to manager Mikhail for his assistance. Explains complex and difficult-to-understand things succinctly, but very clearly. Besides, I called the hotline toll free line and submitted an application online, together with Mikhail. They made a key for me in 2 business days. In general, I recommend it if you are saving your time, but at the same time want to have an understanding of what you are buying and what you are paying for. Thank you. Levitsky Alexander Konstantinovich Samara Personal thanks to consultant Mikhail Vladimirovich for prompt consultation and work on expediting the receipt of an electronic signature certificate. During the preliminary consultation, the optimal set of individual services is selected. The end result is received immediately. Stoyanova N.L. - Chief Accountant LLC "SITECRIM" thanks for operational work and competent help! I was very pleased with the consultation! Dmitry Fomin Expert System LLC thanks consultant Mikhail for his prompt work! We wish your company growth and prosperity! Sukhanova M.S. - AppraiserExpert System LLC, Volgograd Thanks to the consultant, who introduced himself as Mikhail, for his efficiency in working with clients. Ponomarev Stepan Gennadievich Many thanks to consultant Mikhail for his assistance in obtaining the digital signature. For prompt work and advice on issues arising during the registration process. Leonid Nekrasov The company, represented by consultant Mikhail, does the impossible! Acceleration of accreditation in less than 1 hour! Payment upon delivery of the service. I thought this wouldn't happen. With full responsibility, I can advise you to contact the Center for Issuing Electronic Signatures. Good afternoon dear friends! Today we will consider the problem with the FSS automated workplace program, namely "error: keyset not defined." You will most likely encounter this error when loading ELN. We will cope! Go! AWS FSS error: key set is not definedIf you are unable to decide on your own this problem, then you can go to the section and our specialists will help you. I encountered this problem just when downloading an electronic sick leave. Let's update first. Read here how to update the FSS automated workstation. Now let's go to the menu section " Accounting work" and select "Workstation for signing and encryption". Now let's be careful! We need to enter the correct keys. That is, choose our certificates correctly. What certificates to put when loading sick leave into the FSS automated workplaceGo to the section “Personal certificate ELN. Policyholder." This is a certificate from our organization! Select it by clicking on the button with the open folder.
Go to the personal section and select our certificate.
STOP! No certificate? This is already strange! Certificates are not displayed in the FSS automated workplace, what should I do?Since 2019, we are moving to the new GOST for electronic signature. It is called GOST 2012. Until 2019, we used certificates issued under GOST 2001. It turns out that 2019 is a transitional year between the two GOSTs. Now it is allowed to use the certificate of both 2001 GOST and 2012. If you re-issued or issued new certificate in 2019, then with a 99% probability you already have a new GOST 2012. If you issued a certificate in 2018, then most likely it’s still 2001. That’s the whole problem. Now let's find our certificates! Please note that in new versions there is a switch for different GOSTs.
Switching this mode, You will see your certificates. Try installing GOST 2001 first; if the certificates are not displayed, install GOST 2012. I am sure you will find your certificate. That's it, we found our hidden certificate, now let's move on! Installing manager certificatesPersonal certificate ELN. Supervisor. When you issue the director’s certificate, as a rule, it coincides with the organization’s certificate. Installing the right crypto providerNow we need to decide on . It sounds scary and complicated, but now everything will be clear! We go higher and look at which GOST certificate we chose. If you have a GOST 2001 certificate, then in the “Cryptographic Provider” line, select the “Crypto-Pro GOST R 34.10-2001 Cryptographic Service Provider” item. If your certificate is 2012 GOST, then select “Crypto-Pro GOST R 34.10-2012 Cryptographic Service Provider”.
Everything is very simple here. Firstly, I already have an article on this topic, everything is described in detail there, so I won’t write it again. You can read it here. I’ll just say that for a successful installation you need to click 2 buttons: “Install a certificate of an authorized person of the FSS ELN” and “Install a certificate of an authorized person of the FSS.”
SOLVED!Friends! If suddenly the error persists for you, experiment with certificates and GOSTs, with the line Cryptoprovider. The whole mistake lies precisely in this!If you still can’t configure it yourself, then go to the “” section and I will help you! If you need professional help system administrator, to resolve this or any other issue, go to the section and our employees will help you. That's all! Now you know what to do if you have an error in the programAWS FSS error: key set is not defined. If you have any questions, ask them in the comments! Good luck and good luck to everyone! To be the first to receive all the news from our website! |


| Read: |
|---|
Popular:
New
- Setting up a VPN connection using Windows OS
- What to do if your Mac gets hot on Windows Cool down your MacBook on Windows
- Your Mac will start to slow down wildly, but this can be avoided
- What are the features of the game on the European Archeage server?
- Nokia Lumia 630 ds. hit business smartphone. Communications
- How to programmatically open external processing?
- A Guide to Systems for Creating Installers
- ESET NOD32 Antivirus free download Russian version
- Picmonkey - fast online photo editor Frames
- How to build a graph in Mathcad?


