Sections of the site
Editor's Choice:
- The best Russian speech recognition program Offline speech recognition how to disable
- How to find out the VID, PID of a flash drive and what are these identification numbers used for?
- Huawei P8Lite - Specifications
- How to unlock a Xiaomi phone if you forgot your password
- Apptools: how to earn money by playing
- Lenovo Vibe K5 Plus - Specifications Audio and Camera Specs
- Decided to switch from Windows to Mac?
- How to use Google Photos, overview of Google foto login functions
- Payment system Payza (ex-Alertpay) Payza login to your personal account
- How to open APK and how to edit?
Advertising
| Mac os screenshot of the program window. How to take a screenshot on a Mac and MacBook: different methods |
How to take a full screenshotPress Shift + Command + 3. The file will be saved on your desktop as a PNG image. This is a standard screenshot option, similar to pressing the Print Screen key on a Windows PC. How to take a screenshot of a selected area of the screenUse Shift + Command + 4. The cursor will change to a crosshair icon, which you can use to highlight the desired area of the screen. As soon as you lift your finger, the screenshot will be saved. The selected area can be modified using additional keys (pressed after highlighting the screen):
Esc cancels the selection. How to take a screenshot of a window on MacUse the combination Shift + Command + 4, then press the space bar and use the cursor to select the desired window. How to take a screenshot of a menu on MacTo take a screenshot of the OSD or Dock, press Shift + Command + 4 and then Spacebar. This combination works on the same principle as the previous one. If you hold down the Command key after pressing the spacebar, you can select not the entire menu, but its individual elements. How to take a screenshot of the Touch BarPress Shift + Command + 6. Just like regular screenshots, the Touch Bar screenshot will appear on your desktop as a PNG file. How to Take a Screenshot on Mac Using Screen Capture UtilityApple has updated its Screenshot utility. Now you can call it with the keyboard shortcuts Shift + Command + 5 and take the screenshots described above using the buttons on the application toolbar. After selecting the screenshot option, you need to click “Snapshot”, and the screenshot will be saved on the desktop. The first button is responsible for taking a snapshot of the entire screen, the second is for a screenshot of the window, and the third is for taking a snapshot of the selected area. The application also has the option. The fourth button on the toolbar starts recording the entire screen, and the fifth - only the selected area. How to Set Up Screenshots on MacWherever you make changes, they will apply to all screenshots: both those taken using hotkeys and those taken in the Screenshot utility. How to set up screenshots in Terminal1. How to change the save locationTo prevent screenshots from cluttering your desktop, you can change the location where they are saved. For example, to the Screenshots folder in Documents. To do this, create the desired folder, if it does not already exist, and enter the following command in “ ”: defaults write com.apple.screencapture location ~/Documents/Screenshots && killall SystemUIServer To return settings to default, enter: defaults write com.apple.screencapture location ~/Desktop/ && killall SystemUIServer 2. How to change the formatPNG provides the highest image quality, but such screenshots weigh quite a lot. If necessary, you can change the format to regular JPG. To do this, just enter the following command: defaults write com.apple.screencapture type jpg && killall SystemUIServer To return to the PNG format, use the command: defaults write com.apple.screencapture type png && killall SystemUIServer 3. How to remove shadowsBy default, macOS adds shadows to window screenshots. They look as beautiful as they do in the system, but this is not always necessary. To turn off shadows, enter the following command in Terminal: defaults write com.apple.screencapture disable-shadow -bool true && killall SystemUIServer You can return shadows using this command: defaults delete com.apple.screencapture disable-shadow && killall SystemUIServer How to set up Screenshot in macOS MojaveFrom the toolbar, open the Options menu. Here you can select a save location, take a picture with a delay of 5 and 10 seconds, as well as options for displaying the cursor, remembering the last shooting mode and disabling the floating thumbnails that appear after taking a screenshot. For all these devices, there is a quick and easy way Each of the major operating systems - Windows, macOS, Android and iOS - includes one or more ways to take screenshots. Here's a quick and easy guide to taking screenshots on all four OSes. Screenshots on Mac Current versions (Mojave and Catalina) of macOS come with a screenshot app, accessed by pressing Shift-Command (⌘)-5.
A command bar will open and give you various options. You can take a screenshot of a screen, a window, or a specific area; You can also create a video of all or part of the screen. There is an Options button that lets you choose where you want to save the screenshot, and you can also set a short delay. When you're ready, click on the "Capture" button at the right end of the command line. To take a screenshot of the entire screen, press Shift-Command-3. Screenshots on Windows 10 PC Depending on your specific system, you can take a screenshot by pressing the Windows logo key at the same time as the PrtScrn (or PrtSc) key (which is usually at the right end of the function key row). If this doesn't work, you can try adding the Ctrl or Fn key to the combination. The image will be saved in the Pictures > Screenshots folder as a PNG file.
If you want, you can force the PrtSc key to trigger Snip & Sketch when you press it.
Go to your computer's Settings by clicking the Start button in the bottom left corner and then the gear icon that appears above it. Screenshots on an Android phone There are two ways to take a screenshot of your Android (assuming you have Android version 9 or 10):
Some Android phones (like some Samsung and Huawei phones) allow you to take "long" screenshots, where you can scroll down the screen and capture the entire page. Check your phone's support page if you think you might have this screenshot option - trust me, it's very convenient. If you want to find all your previously taken screenshots: Go to the app's photos. Instructions for creating screenshots for . Screenshots on iPhone Taking a screenshot from iPhone is very simple:
Screenshot- a standard utility for taking screenshots. Forget about Windows' PrintScreen and Paint. Apple did everything simply and elegantly. 1. Open the program Screenshot. The application can be found along the way Finder → Programs → Utilities → Screenshot, via Spotlight search or .
Starting with macOS Mojave app Screenshot You can also launch it with a keyboard shortcut ⌘Cmd + ⇧Shift + 5 on keyboard. The application is attractive due to its ease of use and compactness. Once launched, a toolbar will appear at the bottom of the screen.
2. Select one of the following options (screenshot above): "Full Screen Capture", "Snapshot of the selected window" or "Snapshot of selected area".
When choosing "Capture the entire screen" you will get a screenshot immediately if you don't set a timer. 3. Click on the window or mark part of the screen if you have selected one of the remaining options. Your screenshot will be taken immediately after selection. 4. If necessary, right-click on the screenshot thumbnail that appears in the lower right corner to open the context menu.
Use the context menu to choose where to save the screenshot, and to share, edit, show in Finder, delete, or star it. How to choose a save location for screenshots and screen recordings in macOS Mojave and laterWhile you can choose from a limited set of locations to save screenshots and recordings after they've been taken, the new version of the OS also allows you to make a default choice. 1. Open the Screenshot program ( , through search Spotlight, Launchpad or click ⌘Cmd + ⇧Shift + 5 on the keyboard on the keyboard to open the screen toolbar. 2. Press the button "Options" in the panel that appears at the bottom of the screen.
3. Select "Desktop", "Documentation", "Clipboard", "Mail", "Messages" or "Preview" V "Save to" to set the save location.
How to Set a Timer to Take Screenshots in macOS Mojave and Newer1. Open the program Screenshot 2. Click "Options". 3. To set a timer, select "5 second" or "10 Seconds" to disable, select option "No".
How to show the mouse cursor in screenshots in macOS Mojave and later1. Open the program Screenshot by any of the methods indicated above. 2. Click "Options". 3. Click "Show mouse cursor".
How to edit a screenshot in macOS Mojave and later1. After taking a screenshot, a thumbnail will appear in the lower right corner. Click on it to start the mode "Marking".
Markup can also be started by clicking on the screenshot thumbnail right click and selecting the option “ Marking".
3. Use the toolbar "Markings" to draw, write, highlight, add shapes, insert text, sign, rotate, or select text styles using the toolbar at the top of the Quick View window. 4. Click "Ready" to save changes.
How to take a screenshot using Screenshot (macOS High Sierra and earlier)
After starting the application Screenshot(the program can be found along the path Finder → Programs → Screenshot, through search Spotlight or Launchpad) in the menu bar, go to the screenshot tab and select one of the available screenshot options:
How to take a screenshot using keyboard shortcutsApplication Screenshot- this is of course great, but once you remember a couple, you can easily take several types of screenshots literally instantly. All you have to do is imagine that you are a pianist and at first write out the combinations on a sticker and stick them on the computer display:
It is noteworthy that you can insert screenshots not only on the Mac on which they were created, but also on devices thanks to Universal clipboard(Universal Clipboard). We wrote more about how this function works and how to activate it in.
All screenshots are saved to the desktop in the " Screenshot of YYYY-MM-DD in HH.MM.SS» (Screenshot – date – time). Both the path and name can be changed using Terminal commands. We wrote about how to change the path along which screenshots will be created. To change the default name, enter the following command in Terminal and press Return (Enter): defaults write com.apple.screencapture name "any name"; killall SystemUIServer You can return the name to its original state with the command: defaults delete com.apple.screencapture name; killall SystemUIServer To remove the shadow cast by a window, run the following command: defaults write com.apple.screencapture disable-shadow -bool true; killall SystemUIServer Returning to the initial state is carried out with the command: defaults delete com.apple.screencapture disable-shadow; killall SystemUIServer If you need to take a screenshot on a Mac, you can look for the "Print Screen" button like on some keyboards.But you can take a screenshot on an Apple computer a little differently than on a Windows computer. On a Windows PC, all you need to do is press the "PrtScr" or "Print Screen" key on your keyboard. Once you press this key, Windows will automatically take a screenshot in full screen mode and save it to the clipboard. To export or save this screenshot to an image file, you will need the help of an image editing program such as Microsoft Paint or Photoshop. Simply paste the contents from your clipboard into Paint (or click Ctrl+V ) and save it as a new image file. But how do you take a screenshot on Mac? This page will guide you through 3 keyboard shortcuts that will take different types of screenshots on your Mac. Print screen options on MacMac OS X has more advanced screenshot features than Windows. In fact, there are three methods you can use to take a screenshot of your Mac:
You can use any method to take a screenshot and save it on your desktop without using a photo editor (unlike Windows). There are three keyboard shortcuts you can use on your Mac OS computer to take a screenshot.Each keystroke does a different job—you'll be able to take a full-screen screenshot, a partial screenshot, or a screenshot of a specific app, depending on which key combination you use. How to take a photo (screenshot) in full screen on MacIf you want to take a screenshot of the entire screen, use this keyboard shortcut: Command + Shift + 3 When you press Command + Shift + 3,Your Mac takes a snapshot of your entire screen and saves it to your desktop. If you are using more than one monitor, this combination will create a larger image file that includes all connected monitors. How to Screenshot Only Part of the Screen on MacIf you want to take a screenshot of only a small part of the screen, press this key: Command + Shift + 4
When you press these keys on your keyboard, a selection box appears that allows you to select a specific area of the Mac screen to capture. It then automatically saves it as an image file on your Mac's desktop. So, here are the complete instructions on how to take a screenshot on Mac in a selected area:
While dragging the crosshair pointer, you can also click Shift , Option or Space (Space) and change the way you select a part of the screen to take a screenshot. If you select a part of your Mac screen but change your mind and want to select a different area, simply press the Esc key to undo your actions. How to take a photo of a specific window on MacTo take a screenshot of a specific application on your Mac OS X computer, simply follow these instructions:
How to Find a Screenshot File on MacFor all of the above methods, the image file will be automatically saved to your Mac's desktop as a PNG file (as opposed to a JPG) with a name like " ScreenShot xx-xx-xx " These "xx-xx-xx" numbers were automatically generated based on the date and time the screenshot was taken.
If you don't want to clutter your desktop, you canchange the default file saving location,using System Setup in Mac. If you're using a newer operating system like Mojave, the features are more advanced, but the basic keyboard shortcuts are the same. Fair, not overpriced and not underestimated. There should be prices on the Service website. Necessarily! without asterisks, clear and detailed, where technically possible - as accurate and concise as possible. If spare parts are available, up to 85% of complex repairs can be completed in 1-2 days. Modular repairs require much less time. The website shows the approximate duration of any repair. Warranty and responsibility A guarantee must be given for any repairs. Everything is described on the website and in the documents. The guarantee is self-confidence and respect for you. A 3-6 month warranty is good and sufficient. It is needed to check quality and hidden defects that cannot be detected immediately. You see honest and realistic terms (not 3 years), you can be sure that they will help you. Half the success in Apple repair is the quality and reliability of spare parts, so a good service works with suppliers directly, there are always several reliable channels and your own warehouse with proven spare parts for current models, so you don’t have to waste extra time. Free diagnostics This is very important and has already become a rule of good manners for the service center. Diagnostics is the most difficult and important part of the repair, but you don't have to pay a penny for it, even if you don't repair the device based on its results. Service repairs and delivery A good service values your time, so it offers free delivery. And for the same reason, repairs are carried out only in the workshop of a service center: they can be done correctly and according to technology only in a prepared place. Convenient schedule If the Service works for you, and not for itself, then it is always open! absolutely. The schedule should be convenient to fit in before and after work. Good service works on weekends and holidays. We are waiting for you and working on your devices every day: 9:00 - 21:00 The reputation of professionals consists of several points Company age and experience Reliable and experienced service has been known for a long time. How many masters in areas If there are always several engineers waiting for you for each type of equipment, you can be sure: Technical literacy If you ask a question, a specialist should answer it as accurately as possible. |


| Read: |
|---|
Popular:
Bioshock remastered won't start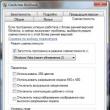
|
New
- How to find out the VID, PID of a flash drive and what are these identification numbers used for?
- Huawei P8Lite - Specifications
- How to unlock a Xiaomi phone if you forgot your password
- Apptools: how to earn money by playing
- Lenovo Vibe K5 Plus - Specifications Audio and Camera Specs
- Decided to switch from Windows to Mac?
- How to use Google Photos, overview of Google foto login functions
- Payment system Payza (ex-Alertpay) Payza login to your personal account
- How to open APK and how to edit?
- Review of the Alpha GT smartphone from Highscreen Packaging and delivery


