Sections of the site
Editor's Choice:
- What is the difference between PCI Express and PCI?
- Bat file commands. How to create a bat file? Basic commands. Bat files, examples Bat file contents
- Cognitive wireless self-organizing networks
- What information is important?
- Origin – where to get the latest version, how to download and install correctly
- How to set up hot keys for any program How to set up keyboard keys
- Take your time buying DVB-T2 tuners
- QQ: register and set security questions Here is a short list of requirements for email marketing in China
- How to put VKontakte comments on WordPress
- VKontakte webcam: new features
Advertising
| Minitool partition wizard how to change the language. What to do with excess space on the system disk |
|
Hello friends, today I want to write a review of an interesting program by foreign developers called MiniTool Partition Wizard. I’ll say right away that the program allows you to work with disks. Now we’ll talk about what it is, what capabilities it has. New review of version 10.2 - So, the MiniTool Partition Wizard program is a disk manager that contains many features and functions for working with disk partitions. There are several versions of this program; the more expensive version you choose, the more functions will be available to you.
Merge partitions without damage. And this is just a small part of the functions that are available in the program. As I said above, there are several editions of this utility. Professional Edition. The same functions are available, plus it allows you to create bootable CDs or flash drives. This is useful if there are problems with the operating system and you cannot work with disks. There are more opportunities than in free version. Server Edition. This type the programs can be used in a commercial environment. A version has been developed for Windows Server and Windows PC, all functions of previous versions are available. Enterprise Edition. This version is aimed at enterprises, but almost the same functions are available. Can be used on an unlimited number of computers. Technician Edition. This version has no restrictions and is suitable for all types of Windows OS, absolutely all functions are available. The version costs $699. Bootable CD. A special program for creating bootable CDs, the same as in the built-in functions of previous versions. Thus, we have analyzed the program for working with disks. You can download MiniTool Partition Wizard for Windows XP, 7, 8 and Windows 10. The interface is very nice and simple, everything is intuitive. If you have any questions, you can go to the official website of the program and find out information from the developers. I would like to write a few words about an interesting utility for working with disks and SSDs - MiniTool Partition Wizard. Firstly, it has been updated to version 10.2, which means there is something new that we should now know about. Compatibility with Windows 10 has also appeared, so you should not expect any crashes or bugs from the program. Now Partition Wizard has a fairly large rating and has already been downloaded by more than 20 million users. You can download it from the official website. A year ago I already wrote and described the functionality, but let’s take a closer look. The utility has many functions for optimized use disk space, as well as protecting your data. You can work with partitions and disks and perform manipulations such as resizing a partition, copying a disk, scanning lost partitions, . Very often a problem arises and vice versa, so the program can do this. Availability of features such as checking the disk for bad sectors, and this, by the way, is very important and you don’t need to look for additional utilities to format the disk at the same time. The MiniTool Partition Wizard utility has all this, so to speak, ten in one. Of course, not much is available in the free version, but purchasing PRO version will allow you to take advantage of all the functions. Now there are 5 versions of this utility: Free, Professional, Server, Enterprise, Technician. To access all functions, it is enough to have a professional edition. What does the PRO version have that the free version doesn't?As you can see, the professional version has a lot of functions that are not available in the free version, I think it makes sense to buy the program. To avoid paying $39 or $59 for a license forever, you can buy the professional edition forever for $99, and I think that's a smart decision. Moreover, the license is tied to 3 PCs. Of course, first you need to test the utility and understand its effectiveness, that’s why it exists FREE version, and then decide whether to buy it or not. Another disadvantage of the professional version is that you cannot use it on Windows Server; for this you need to buy a special version. The good thing about the program is that it has a lot of functions and capabilities, a whole set is collected in one and you don’t need to download ten utilities that only do their job. Of course, it is still unknown how effective each of the program’s functions is, but this is a matter of time, especially since so many people use the utility. Let's now summarize how many functions there are in the program:
And many more functions. Well, what do you say? The program is just great. In the following articles I will try to describe the operation of several functions. For example, I already wrote, . That's all, good luck. Formatting hard drive This is the process of forming a new file table and creating a partition. This deletes all data on the disk. There may be many reasons for carrying out such a procedure, but the result is the same: we get a clean disk that is ready for work or further editing. We will format the disk in MiniTool program Partition Wizard. This powerful tool, which helps the user create, delete and edit partitions on hard drives.
1. Run the downloaded installation file, click “Next”.
2. Accept the license terms and click the “Next” button again.
3. Here you can select the installation location. It is recommended to install such software on the system disk.
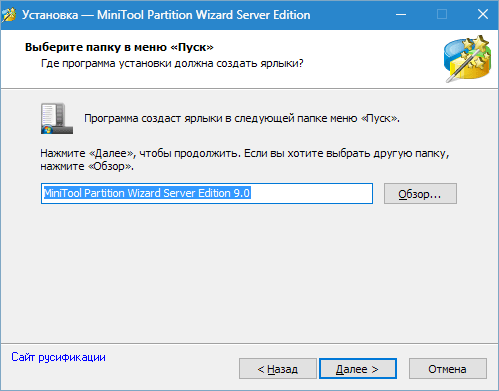
4. Create shortcuts in the Start folder. You can change, but you cannot refuse.
5. And an icon on the desktop for convenience.
6. Check the information and click “Install”.
7. Done, leave a checkmark in the checkbox and click “Finish”.
So, we have installed MiniTool Partition Wizard, now let's proceed to the formatting procedure. This article will tell you how to format an external HDD. With regular hard drive You will need to perform the same steps, except that a reboot may be required. If such a need arises, the program will notify you about it. FormattingWe will format the disk in two ways, but first we need to determine which disk will undergo this procedure. Media DefinitionEverything is quite simple here. If external drive is the only removable storage device in the system, then there are no problems. If there are several media, then you will have to be guided by the size of the disk or the information recorded on it.
In the program window it looks like this:
MiniTool Partition Wizard does not automatically update the information, so if the disk was connected after starting the program, it will need to be restarted. Format operation. Method 11. Click on the partition on our disk and on the left, on the action panel, select “Format partition”.
2. In the dialog box that opens, you can change the disk label, file system, and cluster size. Let's leave the old label, choose the file system FAT32 and the cluster size is 32kB (for a disk of this size, just such clusters are suitable). Let me remind you that if you need to store files of 4GB or more in size on a disk, then FAT will not work, only NTFS.
Click "Ok". 3. We have planned the operation, now click “Apply”. The dialog box that opens contains important information that you need to disable power saving, because if the operation is interrupted, problems may arise with the disk.
Click "Yes". 4. The formatting process usually takes a little time, but this depends on the size of the disk.
The drive is formatted with the FAT32 file system. Format operation. Method 2This method can be used if there is more than one partition on the disk. 1. Select a section and click “Delete”. If there are several sections, then we perform the procedure with all sections. The partition is converted to unallocated space.
2. In the window that opens, assign a letter and label to the disk and select the file system.
MINITOOL PARTITION License type: Quacked Languages : Windows 8, 8 64-bit, 7, 7 64-bit, Vista, Vista 64-bit, XP, XP 64-bit Downloaded: Do you want to handle SD cards like a pro? This guide will help you with that! Personal SD cards are now widely used in mobile devices. They are used for the purpose of storing system and user files. The price of such cards is low, and at the same time there is a large selection of volumes. Today we will talk about migrating third-party custom applications. An SD card is perfect for this purpose. Before transferring, you should prepare the card accordingly. We will talk in detail about creating a second partition on microSD for its subsequent use. Preparing the SD cardFirst, it would be a good idea to check the card for errors, which can be done using Windows factory tools. After this, you need to find any program that allows you to create new partitions on the SD card. IN in this example this will be done using MiniTool Partition Wizard Home Edition. This free program, represents all the functions we need. You can download it from our website using this link. Very good, now you can move on to completing the task at hand. To begin, the SD card needs to be connected to the PC. Use a card reader or any other analogue for this. If there is important data on the card, do backup copy before the process, otherwise the information will be deleted. Open the MiniTool Partition Wizard Home Edition utility. This is what the main program window looks like.  Check if your SD card appears in the list of connected removable drives. Most likely, there will be only one partition on it, which we will now delete. Using the mouse, click on it, thereby activating it. Next, on the menu bar, click “Partition”, and then “Delete”.  After this, all free memory will be marked as “Unallocated”, that is, not allocated. Now you need to select the unmarked area, after which we again go to the “Partition” menu, but this time click “Create”.  If you did everything correctly, the Partition Setup Wizard window will appear. Next we move on to creating a section. Preparing Section 2For our purposes, two sections will be enough for us:
So, the last step is to launch the wizard to create partitions. Let's start creating the first of them. We should fill in all the required fields in the window that opens. In the "Partition label" line you need to specify the name of the partition. Choose any name that suits you. Next, select Primary in the “Create As” field. In chapter " File System"You need to select the format of the partition to be created. As we decided, the FAT32 format will be used. Select it in the menu. If the available SD volume is less than 2 GB, you must select FAT. Next you need to assign the beech and the cluster size. You can set these settings as you wish. After that All that remains is to configure the size of the created partition. In the "Size and Location" field, you should configure three parameters:
Also note that you need to leave space for an additional partition.  Creating partition 2 on the SD card Creating partition 2 on the SD card We don't have much left. Further, there will be no particularly difficult tasks. All that remains is to create the second section of the map, and this process is very similar to the one described above. The only difference is that we will select the EXT2 format. Fill in all fields in the same way, but instead of FAT32 or FAT, select EXT2. To use, set up all remaining space. Click "OK". After this, you will be moved to the main window of the utility. If you did it correctly, click the "Apply" button in the top left corner. Mini Tool Partition Wizard will ask you to confirm and start the process.  Press "YES" and wait for the process to complete, after which you can use the card. ConclusionSo, as a result, our SD card has two partitions in FAT/FAT32 and EXT2 format. If we have a backup copy of information, then we can restore it to the user partition. This is done by simple copying. You now have a second microSD partition to which you can transfer applications. We hope that this instruction I liked it and it was useful to you. Introduction: Target: Instructions: Step 1
Step 2
Step 3
Step 4
Step 5
Step 6
p.p.s. All manipulations with the SD card are at your own discretion! Remember, the more applications you transfer to a flash drive, the less life you leave for it! Transfer only “heavy” applications and applications that you rarely use! PapaRoach PapaRoach
26 liked - Introduction: Target: Instructions: First, we need to acquire a program for creating partitions on disks. I personally used it, and I advise you, the program is free and convenient. Step 1
Step 2
Step 3
Step 4
Next, in the “Create As” item, select the “Primary” item: Step 5
In the “Create As” item, select “Primary” again, enter a label name if you want, and the size of the partition will be the rest of the map. And click "OK". Step 6
The process is over! If you made a backup, then we throw the data back onto the FAT32 partition (although you will only see it in the computer explorer) and insert the flash drive into the device and use it to your health! p.s. I don't pretend to be universal. We write about errors and other things in the comments. Glad if it helped someone. p.p.s. All manipulations with the SD card are at your own discretion! Remember, the more applications you transfer to a flash drive, the less life you leave for it! Transfer only “heavy” applications and applications that you rarely use! |


| "> |
|---|
Installing official firmware on Lenovo RocStar (A319) Lenovo flashing

What is the difference between PCI Express and PCI?
- How to restore the menstrual cycle after childbirth:
- Bat file commands. How to create a bat file? Basic commands. Bat files, examples Bat file contents
- Cognitive wireless self-organizing networks
- What information is important?
- Origin – where to get the latest version, how to download and install correctly
- How to set up hot keys for any program How to set up keyboard keys
- Take your time buying DVB-T2 tuners
- QQ: register and set security questions Here is a short list of requirements for email marketing in China
- How to put VKontakte comments on WordPress
- Read:


