Sections of the site
Editor's Choice:
- What is an SSD and how to install it?
- How to put an accent on a letter in Word
- How to convert images to PNG format?
- Technical problems and their solutions v
- Bioshock remastered won't start
- How to set your melody to the desired contact on a Nokia X2 smartphone with two SIM cards
- Free programs for Windows download for free
- How to burn any ISO image to a USB flash drive
- Calls from unknown numbers
- I forgot my Google account password and when I log in I get the message you entered the wrong password.
Advertising
| Mediaget is not removed. Effectively removing MediaGet from your computer |
|
MediaGet is a powerful, freely available torrent client with many additional features not found in any standard peer-to-peer download manager. For example, MediaGet allows you not only to download something and distribute it, but also to search for the desired content and supports previewing videos using the built-in player. MediaGet for Windows 7 contains a huge database of multimedia files with detailed information about each of them. It concerns both the technical parameters of files and their contents (description). The main advantages of the utility are free distribution and no registration. But along with the immense possibilities, there are the presence of advertising, constantly pop-up news and difficulties during uninstallation of the program from a computer running Windows 7. How to properly wash MediaGetNot all users can uninstall the application the first time, because MediaGet is minimized to the tray and continues to function in the background after closing the main window. Thus, even the built-in uninstaller cannot always remove the application from the computer. Let's consider a detailed algorithm for solving the problem so that after uninstalling the program, not a single memory of it remains on the computer.
The second method to get rid of a utility loaded into RAM is to do the following:
See also: How to prevent a user from installing Windows 7 programs
One of the best utilities in this category is Revo Uninstaller, so let’s look at how to remove MediaGet using its example.
The removal will occur in the background, but after the uninstaller runs, there will be some debris left from the operation of MediaGet on the computer. These are utility settings stored both in the OS system registry and on disk in the folder with the Windows 7 user profile.
In this case, the application will create a backup copy of the deleted entries and delete them from the computer without warning. Don't be afraid to delete keys, their records and residual files: the program is trusted by millions of users, and numerous independent tests and awards only confirm the effectiveness and safety of its scanning algorithms.
In our case, Revo did not detect file garbage and did not display any windows prompting us to delete it. (Visited 8,460 times, 1 visits today) windowsprofi.ru How to completely remove MediaGet from your computerHello. In today's world, there are many ways to find interesting content on the Internet. If a few years ago you had to do this manually, spending a lot of time searching for information on various sites, now there are special services. These include Mediaget, which has earned a good reputation, but also has negative reviews. Do you want to know how to completely remove MediaGet from your computer? Why do this?Each user may have their own individual reason. For example, I accidentally downloaded and installed this software. I used it for several days, I didn’t really like it - a lot of advertising, constant imposition of unnecessary software. On forums, people write that they fell for a tempting offer on one of the resources. But after trying to install the application on a PC, the antivirus removes MediaGet, swearing at its components. The thing is that you need to download the utility exclusively from the official page, otherwise you can catch a virus. In general, there can be many reasons why people want to remove unnecessary software. I suggest we get to the point. How to remove MediaGet from a windows computer?If you are tired of this program for viewing and downloading various media content, then I offer simple removal instructions.
A couple more important pointsIf Media Get loads the processor and there is a suspicion of a virus infection, then in addition to the above instructions, you need to run a scan for malicious scripts. I recommend the DrWeb CureIt utility. It is better to run it in safe mode so that attackers cannot block the scanner’s capabilities. Please note that the torrent client can work in hidden mode (not only on the computer, but also on the phone), consuming Internet traffic during distribution. Therefore, if you intend to use the software, do not forget to stop the download after downloading a movie, game or other content (so that the distribution stops). Sincerely, Victor! it-tehnik.ru How to remove MediaGet from your computerMediaGet is a torrent client with a convenient search function, a built-in HD player and a large catalog of varied content (games, movies, music). Allows you to watch videos and listen to music without waiting for the download to complete in streaming mode. If you decide to remove this program from your computer, this article will help you. Select one of the uninstallation methods described below and start cleaning. Method number 1: removal through the Control Panel1. Before uninstalling Mediaget, close it:
 2. Open the directory of installed programs:
  3. To remove Medi Get, select its name by clicking in the list. And then in the top panel, click “Delete/Change”.  4. In the “Installer...” window, confirm the uninstallation: click the “Yes” button.  5. Upon completion of the cleaning procedure, the page of the official website “We are very sorry that you are leaving!” will automatically open in the browser. On it you can report the reason for deleting the application from your computer, as well as re-download its new version. Links are placed in three separate blocks.  Method No. 2: cleaning with an uninstaller utilityIf MediaGet for some reason cannot be removed through the Windows Control Panel or you want to better clean the system from its elements, remove it using a special uninstaller program (for example, Revo Uninstaller, Ashampoo Uninstaller, IObit). In this article, we will look at the option of uninstalling a torrent client using the Uninstall Tool utility (http://www.crystalidea.com/ru/uninstall-tool). It performs removal 3 times faster than the standard operating system function. 1. Launch Uninstall Tool. In the list of installed software, click Media Get. 2. In the left panel, click the “Uninstall” function.  3. Confirm deletion in the window that opens: click “Yes”. 4. Wait until the system partition and registry are scanned for application remnants.  5. In the “Delete Leftovers” window, click the “Delete” button. PreventionAfter uninstalling Media Get, clean up the system (use one of the suggested programs): Reg Organizer: Disk Cleaning (section in the left panel) → “Scan” button → “Clean up” option (appears after scanning is completed).  CCleaner: “Cleaning” section → “windows” and “Applications” tabs (check the boxes next to the items that you want to remove/clean) → Analysis → Cleaning.  Successful uninstallation of the MediaGet torrent client!
If you found the article useful, don’t forget to like it! In contact with Classmates izbavsa.ru Step-by-step instructions: how to remove "Media Get"People who spend a lot of time on their computer may well encounter the following problem - an application once downloaded has become useless and should be deleted. But, unfortunately, this is not always easy to do. This article will discuss how to remove “Media Get”. Of course, this program is not one of the most difficult to remove, but many still have difficulties in this process. Fortunately, the Windows operating system has not one, but many ways to uninstall programs. The article will examine three; they are both similar and at the same time radically different from each other. How to open the program root folderBefore talking about how to remove Media Get, it is necessary to mention how to open the root folder of this program. This is necessary because the first method presented in this article requires access to files, and many do not know how to get to them. So, in Windows, “Media Get” is usually installed on drive C, but this is if you did not specify a different directory. Let's look at all the ways to access this folder. Open via shortcut and Start menuLet's start with the simplest thing - opening through a program shortcut. This method is suitable not only for MediaGet, but also for all other programs. If after installation there is a shortcut on your desktop, then you can easily get to the application directory to which it belongs. To do this, you need:
After this, the folder we need will immediately open, that is, the root one. But it may also happen that after installing the program, the shortcut is missing on the desktop (you did not check the appropriate box during installation or simply deleted it). Then you can get to the application directory using the Start menu. To do this, you need:
That's all, as mentioned above, this is the easiest way to find the root folder of the program. But what to do if the desired object is not on the desktop or in the Start menu? Don’t despair, the MediaGet directory can be found in another way. Opening through hidden foldersIf you did not make any adjustments when installing the program, then your program was installed on drive C. Now you will find out exactly where MediaGet 2 is located and how to get there. But before that it’s worth making a small remark. The fact is that the "Media Get" version of the new assembly is installed a little differently - in a hidden folder. To get to the root folder of the program, you will need to open this hidden folder. But in order not to perform unnecessary manipulations, first look for MediaGet 2 in Program Files, which is located on drive C. If it is not found there, then do the following:
You have just made the very folders in which the program is installed become visible. Now you can get to the files. To do this you need:
Now you are where you need to be. All you have to do is go to the MediaGet 2 folder - this is the very root folder of the program. Removal via uninstallerSo, now let’s figure out how to remove “Media Get”. Using an uninstaller is exactly the method that requires finding the root folder of the program, and since you already know where to find it, you can easily use it. In the root folder you need to find a file called mediaget-uninstaller. This file will help you remove the program. Open it, you will immediately be asked: “Are you sure you want to remove MediaGet?” If you click the "Yes" button, the program and all its components will disappear forever from your hard drive, otherwise the action will be cancelled. This was the first way to remove “Media Get” from a computer, but not the last. It's quite simple if you know where to look for the program's root folder, but if you've tried your best to find it and failed, then the second method is just for you. Uninstall via Programs and FeaturesNow let's talk about how to remove "Media Get" using standard Windows tools. This method can also be used to remove other programs. Initially you need to get into “Programs and Features”, to do this you need to:
Everything here is quite simple, but if suddenly you were unable to find this utility in this way, then you can enter the following expression in the address bar of Explorer: “Control Panel\All Control Panel Items\Programs and Features”. In Programs and Features, find the name of the application you need and click “Uninstall” in the top panel. Then agree with your decision, and the program will disappear completely. Removal via the Uninstaller program
Now it's time to tell you about the last way to remove the Media Get program from your computer. It is applicable if MediaGet is not in Programs and Features, but you are absolutely sure that it is on your computer. You will need to download the Uninstaller program from iObit. After installing and opening it, you will see something similar to Programs and Features. That's exactly what it is. There is a list of programs, and to remove one of them, you need to select it and click the "Delete" button.
Here the question may arise about how this method differs from the previous one. In general, nothing, but it may well be that MediaGet will not be visible in Programs and Features, but this program will detect it in any case. fb.ru How to remove mediaget from your computerHello regular and new visitors to my blog prigoditsy.ru! Today I want to dwell in detail on the topic of how to remove mediaget from your computer. I have an article on my blog “MediaGet - a torrent client with search and player.” It describes in detail the installation and configuration of mediaget and briefly describes how to remove the mediaget program from your computer. Note: To view a larger image of any screenshot in a new window, click on it. Although everything seems to be clear there, a specific question, and I quote: how to remove media gett, is received almost every day. Therefore, today, while writing this article, I will go through the procedure for removing this program and will describe and show you in detail, step by step, in pictures. I have Windows XP installed, but I don’t think anything will be much different in Windows 7. The MediaGet program is very good, but everyone has their own reasons for deleting them; we won’t consider them today. Before we begin the actual removal, let's do the following: 1. If the program is integrated into browsers, then you need to uncheck the boxes in the settings, as in this screenshot in the article about MediaGet. 2. In the settings of the browsers themselves, look to see if it is included in extensions and add-ons; if so, disable them. 3. Although the program developers write that when uninstalling, only old versions can remain in the processes, we, regardless of the version, will go to the “Task Manager” and end the process, if, of course, it is there, it should not be in new versions. To go to the “Task Manager”, right-click on the toolbar next to the tray (the tray is located at the bottom, where the clock is). In the window that appears, click “Task Manager” In the “Task Manager” window that opens, click on the “Processes” tab, then find and select “mediaget.exe” and click the “End process” button. A warning window will pop up, click “Yes” in it. You can also access the Task Manager by simultaneously pressing the key combination Ctrl – Alt – Del. There are various rumors circulating on the Internet about MediaGet, a clever torrent client with a media player (in English it means “torrent client”). Someone praises him on the forums and can’t get enough of him: click or two with the mouse, wait a little, and again - all the desired content is already on the PC, and you can watch and listen to media files right while downloading. And there are also indignant users about MediaGet. But we won't go into details about the app's ratings. Since this article is intended to help everyone who wants to remove Mediaget from their computer completely. Regardless of the user’s mood: for example, you didn’t like the program, it turned out to be useless, or you need to reinstall it, etc. There are at least three ways to uninstall MediaGet. Let's take a step-by-step look at how to use them. Method #1: Activating the standard Windows optionIf you are well versed in Windows and do not want to install and download additional programs to get rid of the torrent client, then this method is definitely for you. A little patience and attention, and the software will be successfully neutralized.
Let's start cleaning: 2. Right-click on it, and then in the menu that appears, select the “Exit” command.
To be on the safe side, you can track the program processes:
3. Now that all torren client modules are “de-energized,” you need to go to the uninstall programs section. To access:
For those who are not very familiar with system directives, we provide another option for moving to the section. You'll have to do a little mouse work: in the “left” OS menu, or rather on the right side of it, click “Control Panel”;
Click “Uninstall a program” in the submenu;
4. Almost everything is ready to start the process - uninstalling the program. Find MediaGet in the installed software directory. Select a line by left-clicking. Click the “Delete/Change” command (located above the list).
5. Follow the instructions of the uninstaller to complete the uninstallation process. Some users are very pedantic about the software cleanliness of their computer. And, in fact, they want no traces of previously installed applications to remain at all. If so, we can recommend Method No. 3, described below in this article. Or, to avoid using any auxiliary utilities, follow these steps: 1. Open the “Run” window (Win+R). Enter the command “regedit”, click “OK”.
2. In the editor menu, go to “Edit”, select “Find”.
3. In the “Search” option, enter the query “mediaget” and click “Find Next”.
4. Delete all found folders and keys with the name of the program (right-click on the object → “Delete” command). After deletion, you must continue the search (pressing the F3 key) until the entire registry has been scanned.
5. After cleaning the registry from residues, you can check the file directories in a similar way: press the key combination “Win+E”; at the top of the window, in the field on the right, enter “mediaget”;
wait until the search is completed; Delete all remaining Mediaget folders and files: right-click → Delete.
Method #2: CCleanerThis removal principle is not much different from the previous one. But it has its own advantage - you will not need to “run” through the system sections and run the uninstaller. CCleaner will do all this for you. In other words: this method is nothing more than uninstallation in semi-automatic mode.
1. Launch the program. 2. Go to the menu: Tools → Uninstall programs.
3. Select the application from the list. 4. In the panel on the right, activate the “Uninstall” command. Follow the uninstaller prompts.
Method No. 3: Soft OrganizerUsing the uninstaller program may seem difficult only for novice users. And, if you are one, we strongly recommend that you do not rush to conclusions. Everything is also simple and easy. And cleaning, by the way, is better when using such a program. Note. The instructions cover removal using Soft Organizer. But nothing prevents you from using some other analogue of this utility if necessary. There are a great many of them on the Internet, paid and free. For example, Revo Uninstaller, Uninstall Tools, etc. 1. Install and launch Soft Organizer on your PC. 2. Click on the MediaGet program directory. 3. In the top panel, click the “Uninstall a program” button.
4. Wait a moment: the utility will perform the analysis.
6. After performing the standard uninstallation (activating the built-in uninstaller of the torrent client), click “Find” in the Soft Organizer window.
7. Get rid of all MediaGet remnants detected by the utility in the registry and file directories.
8. Press the “Finish” button to complete the cleaning procedure. Close Soft Organizer. In general: any of the above methods has its pros and cons. The first one does not require additional programs. The second one eliminates the need to search for the panel to remove programs. The third one performs a complete system cleanup with virtually no user intervention. “Arm yourself” with whatever option is most suitable for you and start cleaning. Successful removal of MediaGet! May your computer always be clean and tidy. One of the most well-known negative aspects of the Windows desktop OS of any version is its ability to attract unwanted files and programs, all spam, advertising and information garbage. When deleting these files and programs, the average user may encounter various kinds of problems: the program may not be removed using the system uninstall programs function, or it may not be in the list of programs at all. Using MediaGet as an example, which is often installed against the will of the user, we will look at how to permanently remove absolutely any program from your computer or laptop. First, let's look at the standard procedure for removing Mediaget - using the built-in functionality of Windows OS. Step 1. Open the Start menu and select Control Panel.
Step 2. Select the "Programs and Features" section.
Step 3. Among the list of programs, find MediaGet and click on the column with the left mouse button, then select “Delete”.
Step 4. After that, you just need to confirm the action by clicking on the “Yes” button.
Uninstalling Media Get using third-party programsHowever, there are often cases when deleting from “Programs and Features” does not bring the desired result, or is even not possible at all. To do this, you will have to use additional software, of which there is plenty, programs such as:
Let's look at removing Media Get using the Revo Unstaller utility: Step 1. First you need to download Revo Uninstaller from the official website. To simply uninstall the program, the functionality of the free version is sufficient.  Step 2. Install Revo Uninstaller. For this:  Step 3. Go to the program and select the “Uninstaller” tab.
Step 4. Select MediaGet from the list of files and then click on the “Delete” field, then confirm the action and scan for residual files on the system. You have successfully removed MediaGet from your computer.
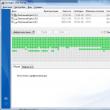
What other features does Revo Uninstaller provide?This utility is quite multifunctional. You can verify this by going to the “Tools” field adjacent to “Uninstaller”:
What additional features and functions does the paid version of Revo Unistaller provide?Above, we only looked at the functions of the basic version of Revo Unistaller, but there is also a paid version called Revo Unstaller Pro, which costs $25.
Its functionality is presented below:
Of course, it's up to you to decide which version you should use. The free, Free version includes the most basic functions, and this will be enough for the average user. But if you want more, you will have to use the Pro version. Video - How to properly remove the MediaGet program
People who spend a lot of time on their computer may well encounter the following problem - an application once downloaded has become useless and should be deleted. But, unfortunately, this is not always easy to do. This article will discuss how to remove “Media Get”. Of course, this program is not one of the most difficult to remove, but many still have difficulties in this process. Fortunately, the Windows operating system has not one, but many ways to uninstall programs. The article will examine three; they are both similar and at the same time radically different from each other. How to open the program root folderBefore talking about how to remove Media Get, it is necessary to mention how to open the root folder of this program. This is necessary because the first method presented in this article requires access to files, and many do not know how to get to them. So, in Get" it is usually installed on the C drive, but this is if you did not specify a different directory. Let's look at all the ways to access this folder. Open via shortcut and Start menuLet's start with the simplest thing - opening through a program shortcut. This method is suitable not only for MediaGet, but also for all other programs. If after installation there is a shortcut on your desktop, then you can easily get to the application directory to which it belongs. To do this, you need:
After this, the folder we need will immediately open, that is, the root one. But it may also happen that after installing the program, the shortcut is missing on the desktop (you did not check the appropriate box during installation or simply deleted it). Then you can get to the application directory using the Start menu. To do this, you need:
That's all, as mentioned above, this is the easiest way to find the root folder of the program. But what to do if the desired object is not on the desktop or in the Start menu? Don’t despair, the MediaGet directory can be found in another way. Opening through hidden foldersIf you did not make any adjustments when installing the program, then your program was installed on drive C. Now you will find out exactly where MediaGet 2 is located and how to get there. But before that it’s worth making a small remark. The fact is that the "Media Get" version of the new assembly is installed a little differently - in a hidden folder. To get to the root folder of the program, you will need to open this hidden folder. But in order not to perform unnecessary manipulations, first look for MediaGet 2 in Program Files, which is located on drive C. If it is not found there, then do the following:
You have just made the very folders in which the program is installed become visible. Now you can get to the files. To do this you need:
Now you are where you need to be. All you have to do is go to the MediaGet 2 folder - this is the very root folder of the program. Removal via uninstallerSo, now let’s figure out how to remove “Media Get”. Using an uninstaller is exactly the method that requires finding the root folder of the program, and since you already know where to find it, you can easily use it. In the root folder you need to find a file called mediaget-uninstaller. This file will help you remove the program. Open it, you will immediately be asked: “Are you sure you want to remove MediaGet?” If you click the "Yes" button, the program and all its components will disappear forever from your hard drive, otherwise the action will be cancelled.
This was the first way to remove “Media Get” from a computer, but not the last. It's quite simple if you know where to look for the program's root folder, but if you've tried your best to find it and failed, then the second method is just for you. Uninstall via Programs and FeaturesNow let's talk about how to remove "Media Get" using standard Windows tools. This method can also be used to remove other programs. Initially you need to get into “Programs and Features”, to do this you need to:
Everything here is quite simple, but if suddenly you were unable to find this utility in this way, then you can enter the following expression in the address bar of Explorer: “Control Panel\All Control Panel Items\Programs and Features”. In Programs and Features, find the name of the application you need and click “Uninstall” in the top panel. Then agree with your decision, and the program will disappear completely. Removal via the Uninstaller program
Now it's time to tell you about the last way to remove the Media Get program from your computer. It is applicable if MediaGet is not in Programs and Features, but you are absolutely sure that it is on your computer. You will need to download the Uninstaller program from iObit. After installing and opening it, you will see something similar to Programs and Features. That's exactly what it is. There is a list of programs, and to remove one of them, you need to select it and click the "Delete" button.
Here the question may arise about how this method differs from the previous one. In general, nothing, but it may well be that MediaGet will not be visible in Programs and Features, but this program will detect it in any case. |


| Read: |
|---|
New
- How to put an accent on a letter in Word
- How to convert images to PNG format?
- Technical problems and their solutions v
- Bioshock remastered won't start
- How to set your melody to the desired contact on a Nokia X2 smartphone with two SIM cards
- Free programs for Windows download for free
- How to burn any ISO image to a USB flash drive
- Calls from unknown numbers
- I forgot my Google account password and when I log in I get the message you entered the wrong password.
- The network adapter does not have valid IP settings - solving the problem


