Sections of the site
Editor's Choice:
- The best Russian speech recognition program Offline speech recognition how to disable
- How to find out the VID, PID of a flash drive and what are these identification numbers used for?
- Huawei P8Lite - Specifications
- How to unlock a Xiaomi phone if you forgot your password
- Apptools: how to earn money by playing
- Lenovo Vibe K5 Plus - Specifications Audio and Camera Specs
- Decided to switch from Windows to Mac?
- How to use Google Photos, overview of Google foto login functions
- Payment system Payza (ex-Alertpay) Payza login to your personal account
- How to open APK and how to edit?
Advertising
| Features of the d link router device and rules for working with it. Choosing a high-quality D-Link router |
|
Today there are hundreds of different routers on the market that allow you to organize your own Wi-Fi network at home. D-Link is one of the leading manufacturers of this type of device. It produces a lot of different routers, among which the D LINK DIR 300 model occupies a special place. It combines optimal price and functionality, for which it has received recognition among users. D LINK DIR 300 routers are often purchased for offices, homes, cottages and various other premises where a high-quality Wi-Fi signal is needed. In this article we will look at how to configure the D LINK DIR 300 router. How to connect the D LINK DIR 300 routerBefore proceeding directly to setting up the router, you need to connect it. To do this you will need to do the following:  How to configure the D LINK DIR 300 routerAfter connecting the router, you can proceed to configure it. First you need to create a wireless network:  At this point, you can consider the local network setup stage complete; now you should go directly to setting up the D LINK DIR 300 router. Any router can be configured via a browser. Follow these steps:  That's all, the setup of the D LINK DIR 300 router is complete. After these steps, the Internet should start working. But, most likely, you want to set up wireless Internet; to do this, you will need to complete a few more steps described below. How to set up a Wi-Fi access point in the D LINK DIR 300 routerIf you have correctly configured the Internet itself according to the instructions described above, you now need to activate the Wi-Fi access point. This is required to be able to connect to the router from any devices via a wireless connection. This is done as follows: 
How to connect via Wi-Fi to a D LINK DIR 300 routerThe last step is very simple - connect to the router via Wi-Fi. The connection method is no different from connecting to any other wireless access point. If your computer has a Wi-Fi adapter, just turn on the wireless network connection, after which a corresponding icon will appear in the lower right corner indicating that it is possible to connect to the Internet via Wi-Fi. Click on this icon and select the D LINK DIR 300 access point, identifying it by the name you specified as part of the setup. Enter the password you specified earlier and connect to the network.
Please note: IfWi-The Fi adapter on your computer is “external”, connected viaUSB, the connection process may vary slightly. Most likely, the connection will occur after installing specialized drivers through the appropriate utility. A router is a network device designed to distribute the Internet to several computers or laptops connected to it by cable or via a wireless Wi-Fi connection Before using the router, you need to install it correctly You can find prices for setting up network equipment in the "" section. You can get additional instructions and solutions to problems associated with poor working Internet in the section | ||||||||
| USB |
This port, depending on the router model, is used to connect: Storage medium (flash drive or NAS) 3G/4G modem for Internet distribution Printer |
|||||||
| POWER | Power supply port |

 |
||||||||
Please note that the router can only have one of two types of ports for the ISP cable - WAN(Ethernet cable with connector) or DSL(telephone cable with connector). A router with a DSL connector is suitable for use only with a provider that provides Internet via. Routers with a connector are suitable for providers who offer Internet services over a dedicated line (Ethernet)
Don't confuse it with a telephone cable

The RJ-45 connector is 2 millimeters wider in width than the RJ-12

One of the main criteria when choosing a router is the type of cable that carries the Internet to your apartment or office. It is this cable that needs to be connected to the WAN/Internet (or DSL) port of the router. There are two most common types of wired Internet connections: via a two-wire telephone cable and via a leased line (twisted pair cable category 5e or 6)
On a computer or laptop with the Windows operating system, press Win+R, in the "Open" field, enter the command " ping 8.8.8.8 -t" without quotes (this is the Google DNS server address), then click OK. If you have an Internet connection, you will see lines with in the console window. Readings are measured and displayed every second
If there is no Internet connection yet, you can ping the router itself with the command " ping 192.168.1.1 -t". Your router's address can be downloaded to the other two octets: 192.168. 0.1 ... 192.168.10.1 ... 192.168.100.1 ... 192.168.1.254
You can find out the router address in the network card settings - this is described in

As you move away from the Wi-Fi signal source or when the interference pattern between the laptop and router changes, the ping will change

If you are far away from the router, the PING console command will display lines with the errors “Interval exceeded...”, “Transmission failed,” “General Failure” and others.

The easiest way to enter the settings of your D-Link router personal account is at 192.168.0.1. You just need to enter it into the address bar of your browser, enter your login and password (usually “admin-admin”), after which the web interface of the admin panel will open. With its help, any beginner can easily enter the step-by-step settings wizard menu in a few clicks, connect the Internet on a D-Link router and distribute it via wifi. If you remember, this login method from the page http://192.168.0.1 is also used for TP-Link, and the default login and password are the same. To log into the router’s personal account, I used the D-Link DIR-620, but these instructions are also relevant for all other models - D-LINK DIR-300, DIR-615, etc. Let's see together what and how...
Login to the D-Link router through the web interface of your personal account - login and password
Getting started with a D-Link router is identical to other companies, such as TP-Link, Asus or Zyxel, on the settings of which I have already made articles.
Before logging into D-LINK:
- connect the router to an outlet
- insert a cable from the Internet provider into its WAN port
- to the LAN port - Ethernet network cable
- The other end of the twisted pair is inserted into the computer.
Next, we turn the device over and look at the sticker on the back that says the entry address to the D-Link router, as well as the authorization data. Most often it looks like “192.168.0.1”, but unlike other companies, it may differ depending on the model.

After this, enter the address http://192.168.0.1 (or another specified one) in the browser - to enter your D-Link personal account, use the login and password from the label. Again, in the vast majority of cases this is “admin-admin”. But some D-Link routers simply use an empty field as the password value, so look carefully at the sticker.

You will need to change this password later in the process.
The entry to the D-Link router settings does not open - I cannot go to page 192.168.o.1
Very often my readers get the error that page 192.168.o.1 does not open. Let me explain - the browser does not enter the D-LINK settings because they write the Russian or Latin letter “O” instead of zero. Don't repeat it, it's actually a NUMBER!
To do this, in Windows, go to “Start > Control Panel > Network and Internet > Network and Sharing Center > Manage network connections > Change adapter settings.”

- Here we right-click on “Local Area Network Connection (Ethernet)” (if you are connected to the D-Link router via cable) or on “Wireless Connection” (if you connect to the router via WiFi)
- Go to the “Properties” menu and look for the “Internet Protocol Version 4” section
- Here we activate 2 checkboxes to obtain IP and DNS server addresses automatically.

Now you know how to log into your D-Link router to get into your personal account settings. Bookmark this page and use this guide for later configuration via the web interface - it will come in handy later!
Select product 7200-1200AC 7200-1200DC 7200-2000AC 7200-2000DC 7200-24 7200-24G 7200-24G2XG 7200-24GE 7200-2XG 7200-48 7200-48P 7200-4XG 720 0-512RAM 7200-ASE3 7200-CM1 7200-CM2 7200-CM3 7200-CM4 ACS-WPCASE ANT24-0800 ANT24-0801 ANT24-0802C ANT24-1200 ANT24-1201 ANT24-2100 ANT24-CB01N ANT24-CB03N ANT24-CB06N ANT24-CB09N ANT24-ODU03M ANT24-ODU1M ANT24-ODU3M ANT70- 0800 ANT70-1000 ANT70-1400N ANT70-1800 ANT70-CB1N ANT70-CB1RN ANT-SP CWM-100 DAP-1325 DAP-1360U DAP-1420 DAP-1513 DAP-1520 DAP-1610 DAP-1620 DAP-2230 DAP-231 0 DAP -2330 DAP-2360 DAP-2660 DAP-2695 DAP-3310 DAP-3320 DAP-3410 DAP-3662 DAP-3760 DAP-3860 DAS-3216/RU DAS-3248/EA DAS-3626 DAS-4192-20 DAS-4192 -30 DAS-4192-40 DAS-4192-50 DAS-4192-60 DAS-4672 DAS-4672-10 DAS-4672-20 DAS-4672-30 DAS-4672-40 DAS-4672-50 DAS-CB1 DCH- M225 DCM-202/RU/C DCS-100 DCS-210 DCS-2670L DCS-3010 DCS-32-1 DCS-32-2 DCS-32-4 DCS-33-1 DCS-33-2 DCS-33-3 DCS-34-2 DCS-3511 DCS-37-3 DCS-4602EV DCS-4603 DCS-4622 DCS-4701E DCS-4703E DCS-4802E DCS-56 DCS-56P DCS-6510 DCS-6513 DCS-6517 DCS-6616 DCS -6915 DCS-7000L DCS-700L DCS-7110 DCS-7413 DCS-7513 DCS-8000LH DCS-8100LH DCS-825L DCS-8600LH DCS-960L DEM-210 DEM-211 DEM-220R DEM-220T DEM-302S-BXD DEM -302S-BXU DEM-302S-LX DEM-310GM2 DEM-310GT DEM-311GT DEM-312GT2 DEM-314GT DEM-315GT DEM-330R DEM-330T DEM-331R DEM-331T DEM-410CX DEM-410X DEM-412CX DEM- 421XT DEM-422XT DEM-423XT DEM-424XT DEM-431XT DEM-432XT DEM-433XT DEM-434XT DEM-435XT DEM-436XT-BXD DEM-436XT-BXU DEM-CB100 DEM-CB100QXS-4XS DEM-CB100S DEM-CB300 DEM -CB300CX DEM-CB300QXS DEM-CB300S DEM-CB50 DEM-CB50CXP DEM-CB50ICX DEM-CB700S DEM-PB1S-OLT DEM-QX01Q-SR4 DEM-QX10Q-LR4 DEM-X10CX-1271 DEM-X10CX-1291 DEM-X10CX-1 311 DEM-X10CX-1331 DEM-X40CX-1471 DEM-X40CX-1491 DEM-X40CX-1511 DEM-X40CX-1531 DEM-X40CX-1551 DEM-X40CX-1571 DEM-X40CX-1591 DEM-X40CX-1611 DEM-X70 CX-1471 DEM-X70CX-1491 DEM-X70CX-1511 DEM-X70CX-1531 DEM-X70CX-1551 DEM-X70CX-1571 DEM-X70CX-1591 DEM-X70CX-1611 DES-1005C DES-1005D DES-1005P DES-1008C DES-1008D Des-1008p Des-1008p+ Des-1016A Des-1016D Des-1018MP Des-1018P DES-1024A Des-1024D Des-10550G DES-1100-06MP Des-1100-16 Des-1100-24 Des-1210-08P DES-1210-10/ME DES-1210-28 DES-1210-28/ME DES-1210-28P DES-1210-52 DES-1210-52/ME DES-3026 DES-3028P DES-3200-10 DES-3200 -28 DES-3200-28P DES-3200-52 DES-3526 DES-3528 DES-7206-Base DES-7210-Base DFE-520TX DFE-551FX DFE-560FX DFL-870 DGE-528T DGE-530T DGE-550SX DGE -560SX DGE-560T DGS-1005A DGS-1005D DGS-1005P DGS-1008A DGS-1008D DGS-1008MP DGS-1008P DGS-1010MP DGS-1016A DGS-1016C DGS-1024A DGS-1024C DGS-1026MP DGS-1026 X DGS-1052X DGS-1100-05 DGS-1100-05PD DGS-1100-06/ME DGS-1100-08 DGS-1100-08P DGS-1100-08PD DGS-1100-10/ME DGS-1100-10MP DGS-1100-10MPP DGS -1100-16 DGS-1100-16/ME DGS-1100-24 DGS-1100-24/ME DGS-1100-24P DGS-1100-24P/ME DGS-1100-26MPP DGS-1210-10 DGS-1210-10 /ME DGS-1210-10MP DGS-1210-10P DGS-1210-10P/ME DGS-1210-12TS/ME DGS-1210-20 DGS-1210-20/ME DGS-1210-26 DGS-1210-28 DGS- 1210-28/ME DGS-1210-28MP DGS-1210-28MP/ME DGS-1210-28P DGS-1210-28P/ME DGS-1210-28X/ME DGS-1210-28XS/ME DGS-1210-52 DGS- 1210-52/ME DGS-1210-52MP DGS-1210-52MP/ME DGS-1210-52MPP DGS-1210-52MPP/ME DGS-1210-52P/ME DGS-1510-10L/ME DGS-1510-20 DGS- 1510-28 DGS-1510-28LP/ME DGS-1510-28P DGS-1510-28X DGS-1510-28XMP DGS-1510-28XMP/ME DGS-1510-52L/ME DGS-1510-52X DGS-1510-52X/ ME DGS-1510-52XMP DGS-3000-10L DGS-3000-10TC DGS-3000-20L DGS-3000-26TC DGS-3000-28L DGS-3000-28LP DGS-3000-28SC DGS-3000-28X DGS-3000- 28XMP DGS-3000-28XS DGS-3000-52L DGS-3000-52X DGS-3120-24PC/*RI DGS-3120-24SC/*EI DGS-3120-24SC/*RI DGS-3120-24TC/*RI DGS- 3120-48PC/*RI DGS-3120-48TC/*RI DGS-3130-30PS DGS-3130-30S DGS-3130-30TS DGS-3130-54PS DGS-3130-54S DGS-3130-54TS DGS-3420-26SC DGS -3420-28PC DGS-3420-28SC DGS-3420-28TC DGS-3420-52P DGS-3420-52T DGS-3427 DGS-3610-26 DGS-3610-50P DGS-3620-28SC DGS-3620-52P DGS-3620 -52T DGS-3630-28PC DGS-3630-28SC DGS-3630-28TC DGS-3630-52PC DGS-3630-52TC DGS-6600-24SC2XS DGS-6600-24SC2XS-C DGS-6600-48S DGS-6600-48S- C DGS-6600-48T DGS-6600-48TS DGS-6600-8XG DGS-6600-CM DGS-6600-CM-II DGS-6600-FAN DGS-6600-FAN-II DGS-6600-PWR DGS-6600-PWRDC DGS-6604 DGS-6608 DGS-703 DGS-707 DGS-711 DGS-712 DHP-1220AV DHP-1565 DHP-208AV DHP-209AV DHP-309AV DHP-329AV DHP-346AV DHP-P308AV DHP-P309AV DHP-P338AV DHP- W310AV DIB-110 DIB-200 DIB-360 DIR-615 DIR-615/GF DIR-620S DIR-640L DIR-651 DIR-806A DIR-815 DIR-815/AC DIR-822 DIR-825 DIR-825/AC DIR -825/ACF DIR-841 DIR-842 DIR-853 DIR-878 DIR-879 DIR-882 DIS-100E-5W DIS-100E-8W DIS-100G-5PSW DIS-100G-5SW DIS-100G-5W DIS-200G -12PS DIS-200G-12S DIS-PWR180AC DIS-PWR40AC DIS-RK200G DIS-S301SX DIS-S302SX DIS-S310LX DIS-S310R DIS-S310T DIS-S330LH DIS-S330R DIS-S330T DIS-S350LHX DIS-S380ZX DKVM-4K DKVM -4U DKVM-CB DKVM-CB/1.2M DKVM-CB3 DKVM-CB5 DKVM-CU DKVM-CU3 DKVM-CU5 DKVM-IP1 DKVM-IP8 DKVM-IPCB DKVM-IPCB5 DKVM-IPVUCB DMC-1000 DMC-1001 DMC-1001 /DC DMC-1002 DMC-1910R DMC-1910T DMC-300SC DMC-515SC DMC-530SC DMC-700SC DMC-805G DMC-805X DMC-810SC DMC-920R DMC-920T DMC-F02SC DMC-F15SC DMC-F20SC-BXD DMC -F20S
Quick search
see also
Question: Why do you need port forwarding in a router and how to configure it (DIR-300NRU, DIR-320NRU, DIR-615/K1 - firmware 1.4.x)
Answer:
Port forwarding is a technology that allows you to access a computer on an internal network from the Internet behind a router using NAT (NAPT). Access is achieved by redirecting traffic on certain ports from the external address of the router to the address of the selected computer on the local network.
Such redirection is necessary if, for example, you use peer-to-peer networks, or want to deploy a server on your local computer with access from the Internet. Also, redirection is sometimes required for multiplayer games.
On firmware 1.4.x, the port forwarding function is called “Virtual Servers”.
In the window that appears, enter:
Username - admin
Password - admin
Click "Login".
The first way is using the setup wizard.
Click "Virtual Server Setup Wizard" in the "Firewall" field

Set the necessary parameters for your virtual server.

Sample- Select one of the six virtual server templates provided from the drop-down list, or select Custom to define your own virtual server settings.
Name Enter the name of the virtual server for easy identification. Can be arbitrary.
Interface Select the connection to which the created virtual server will be bound.
Internal IP Enter the IP address of the server located on the local network. You can select the device currently connected to the router's local network. To do this, select the appropriate IP address from the drop-down list (the field will be filled in automatically).
Remote IP- Enter the IP address of the server located on the external network. If you need to open access to any device on the external network, leave this field blank.
After setting the required values, click the “Save” button. After this, you will be taken to the quick settings page.
In the upper right corner, click on the "System" button and then "Save".

This completes the setup.
The second method is manually.
Connect to the device's Web interface and press the "Advanced settings" button

Select "Virtual Servers" in the "Firewall" section.

In the window that opens, click “Add”

In the window that opens, set the necessary parameters for the virtual server. And click the "Change" button.

Sample - From the drop-down list, select one of the six virtual server templates provided, or select Custom to define your own virtual server settings.
Name - Name of the virtual server for easy identification. Can be arbitrary.
Interface - The connection to which the created virtual server will be bound.
Protocol - The protocol that the created virtual server will use. Select the required value from the drop-down list.
External port (start) / External port (end)- Router port from which traffic will be forwarded to the IP address defined in the Internal IP field. Specify the start and end values of the port range. If you need to specify only one port, specify it in the External port (start) field and leave the External port (end) field blank.
Internal port (start) / Internal port (end) - Port of the IP address specified in the Internal IP field to which traffic from the router port specified in the External Port field will be forwarded. Specify the start and end values of the port range. If you need to specify only one port, specify it in the Internal port (start) field and leave the Internal port (end) field blank.
Internal IP - IP address of the server located on the local network. You can select the device currently connected to the router's local network. To do this, select the appropriate IP address from the drop-down list (the field will be filled in automatically).
Remote IP- IP address of the server located on the external network (in most cases, this field must be left blank).
To set other parameters for an existing server, select the appropriate server in the table. On the page that opens, change the necessary parameters and click the “Change” button.
To delete an existing server, select the corresponding server in the table. On the page that opens, click the “Delete” button. In the upper right corner, click on the "System" button and then "Save".
The focus of this article is D-Link DIR routers, which are by far the most popular devices in Russia. A review of the models will allow the potential user to lean in favor of one device or another. Step-by-step setup instructions, which are almost identical for all models, will help device owners independently configure the router to suit their needs.
Questions to the manufacturer
The D-Link router immediately stands out among its competitors in the network equipment market, and there are several reasons for this. Firstly, the low price, which differs significantly from competitors on store shelves. The second feature is the ease of setup and the relevance of the software on the manufacturer’s official website. Naturally, such arguments attracted the attention of most buyers.
Seeing the excitement around its products, the manufacturer made a marketing move - for several years it was restyling its popular models. Their appearance changed, additional functions appeared, but the model marking remained unchanged. This is what has led to confusion in the network equipment market, when several different devices are hidden under one label, for example, the D-Link DIR-300 router.

Review of popular models
Although there is a large range of D-Link products on the market, only a few models deserve the attention of a buyer who needs a router for home use. What they have in common is their low cost on the network equipment market and ease of use.
The DIR-300 device is considered a bestseller over the past 10 years. There are three modifications on the market that have almost the same price, but completely different appearance. Naturally, each model has a distinctive feature - it uses popular technologies that were relevant at the time of release.
The D-Link 615 router is not far from the sales leader in price, but has slightly greater functionality in terms of organizing local and wireless networks for home and small organizations. Restyling also affected this model, so a potential buyer may find several different devices on the market with the same markings.
A step in the right direction
Most large providers give preference to D-Link products, purchasing them directly from the manufacturer and subsequently installing them for the end user when connecting to the Internet. This is explained by the fact that D-Link DIR routers have a unified control system structure. Simply put, the menu in all devices is identical and you can configure any router from a given manufacturer using one instruction. The only difference is in the appearance of the configuration interface, which changed after restyling, but this does not create inconvenience at all.
Also, the D-Link equipment software does not prevent you from creating and installing your own firmware for the operation of the equipment. This feature allows you to speed up the setup of the provider’s equipment by installing firmware with preset settings.

Single sign-on system
For all D-Link network devices, regardless of configuration, model and intended purpose, including DSL D-Link routers operating through telephone lines, a unified system of authorization and access to network settings has been introduced. Login is carried out using the web interface and one of the browsers installed on the user’s computer. To access, you must specify the device address 192.168.0.1 and go through authorization, which in the factory settings has the same login and password admin.
If the equipment is installed and configured by the provider, then access to the control menu may be limited, and in such cases it is not recommended to attempt authorization by resetting to factory settings. In most cases, routers are configured by the provider at the firmware level, which can disrupt the operation of the device after a hard reset.

Active assistant
After authorizing the user and going to the main menu of the device, all beginners are offered to configure D-Link DIR routers using the active assistant that is integrated into the system. The manufacturer recommends that all users who have no idea about the operation of the equipment and its settings use the services of an interactive program that will independently make the settings.
Within a few minutes, the user will be asked about ten questions with answer options that can be selected with the mouse cursor. If you encounter any difficulties, you can read the tips that the active assistant offers for reading. This manufacturer's solution allows for basic configuration of network equipment.

Manual Wi-Fi setup
The greatest demand among router owners, judging by reviews in the media, is setting up a wireless Wi-Fi network. The fact is that the D-Link router is configured by the provider or the manufacturer according to a pattern - the settings are the same for all users. As a result, wireless networks with the same names appear, for which the same password is suitable. For settings, you need to go to the Wi-Fi menu and follow further instructions.
- By going to the main settings, change the name of the wireless network that will be displayed on mobile devices when searching. In the SSID field you need to enter the required name in Latin letters or numbers and click the “Change” button.
- Going to the security settings, you need to make sure that network authentication is performed using the WPA2-PSK standard. If there is a different standard, it is recommended to change it.
- Set the PSK encryption key, which will be the password for the wireless network when connected. Press the “Change” button and when exiting the control menu, confirm saving the settings.
Fine-tuning access
Most wireless devices have built-in systems to protect against unauthorized access, both wirelessly and via the Internet from outside. Even the cheapest D-Link D 300 router provides a small set of such functions. First of all, we are talking about using filtering in the device settings - you can deny access of all users from the local network to some resources on the Internet. This solution is practiced in offices by blocking access to social networks and online games.
The MAC filter is also popular, allowing you to deny access to the router to all devices whose identifiers are not included in the device settings. In addition, this filter is guaranteed to prevent all attempts by attackers to gain access to user data via a Wi-Fi network.

Any D-Link router has several interesting settings, descriptions of which are difficult to find in the media, and the instructions only describe the procedure for connecting. Users are encouraged to familiarize themselves with much needed functionality.
A strange button with the inscription WPS on the device’s body allows you to wirelessly connect any device that has the Wi-Fi Protected Setup function. You just need to press this button on the router, and on your mobile device select the correct router name from the list provided.
There is no need to buy specialized expensive equipment for everyone who wants to watch IPTV. The D-Link router is quite suitable for such purposes: it has a special configuration menu - you can set individual parameters for each connected device.
Disadvantages of cheap devices
Any network equipment that occupies the niche of cheap devices, regardless of the manufacturer, has low fault tolerance. After all, to reduce the cost of a device, manufacturers have to install inexpensive components that affect the performance of network equipment.
Judging by numerous reviews from owners, the D-Link D 300 router tends to overheat when used continuously for several days. If you plan to use inexpensive network equipment for a long time, it is recommended to consider either active cooling of the device, or give preference to a more expensive device.
Many manufacturers, trying to promote their inexpensive devices on the Russian market, resort to tricks, deliberately inflating the technical characteristics of their devices. The D-Link router also suffered from this fate - its data transfer speed and signal stability are greatly increased. When the channel is fully loaded, many users note a short-term loss of signal or a drop in Internet speed.

Finally
If you put together all the information received, the result will be quite interesting: for a small amount you can buy a decent network device that is easy to set up and has all the technologies available on the market, especially if we are talking about the D-Link DIR-300 router. Minor operating problems associated with overheating and short-term automatic shutdown of the device bother few people. After all, most users always disconnect equipment from the network if it is not needed.
| Read: |
|---|
Popular:
Bioshock remastered won't start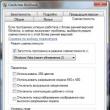
|
New
- How to find out the VID, PID of a flash drive and what are these identification numbers used for?
- Huawei P8Lite - Specifications
- How to unlock a Xiaomi phone if you forgot your password
- Apptools: how to earn money by playing
- Lenovo Vibe K5 Plus - Specifications Audio and Camera Specs
- Decided to switch from Windows to Mac?
- How to use Google Photos, overview of Google foto login functions
- Payment system Payza (ex-Alertpay) Payza login to your personal account
- How to open APK and how to edit?
- Review of the Alpha GT smartphone from Highscreen Packaging and delivery


