Sections of the site
Editor's Choice:
- What is an SSD and how to install it?
- How to put an accent on a letter in Word
- How to convert images to PNG format?
- Technical problems and their solutions v
- Bioshock remastered won't start
- How to set your melody to the desired contact on a Nokia X2 smartphone with two SIM cards
- Free programs for Windows download for free
- How to burn any ISO image to a USB flash drive
- Calls from unknown numbers
- I forgot my Google account password and when I log in I get the message you entered the wrong password.
Advertising
| Stalker call of pripyat optimal graphics settings. Playing Stalker on a weak computer |
|
Part 9: Advanced settings (part 3) Part 10: Conclusion general informationIn this section, I provide you with a full description, comparative screenshots and recommendations for Stalker's in-game settings, allowing you to personally determine the balance between image quality and performance. While I'm trying to identify the influence of settings on each other, it is impossible to determine the most successful parameters (which, for example, +10% increase in FPS), because it all also depends on the specifics of the hardware, and your other game and system settings in combination with each other . Each computer is unique in the components and parameters it has, so two people with the same video card, but different processors, can have completely different numbers of frames per second in a particular scene. To get to the in-game settings, launch Stalker and in the main menu click the Options button. You can read a description of the available settings below: Types of lighting
Render type- This setting determines the renderer currently used to generate in-game graphics and therefore has a primary impact on the overall visual quality of the image and in-game performance. This option allows you to choose between Static Lighting, Dynamic Object Lighting and Full Dynamic Lighting. Each option is explained below: Static lighting- Although Stalker requires full DirectX9 support on your graphics card to run, selecting this option switches Stalker to DX8 rendering mode. In DX8 mode, Dynamic Lighting is completely disabled, as are specific effects such as HDR (High Dynamic Range Imaging). Dynamic Lighting is the realistic interaction of moving light sources with objects, such as rendering proper shadows. DX8 uses regular Static lighting, which requires a less powerful graphics card and provides better performance. This mode is recommended for anyone who cannot get Stalker to work smoothly, regardless of the settings you set. Dynamic Object Lighting– this mode uses full DirectX9, although dynamic lighting is at a minimum, the only limitation is how the flashlight reacts to objects. Most objects in the game world will not cast shadows. Some fixed objects, such as trees or buildings, will continue to cast shadows, but these shadows will not dynamically interact with the lights - they are tied to lightmaps. For example, look at a tree when the sun rises, in this mode the shadows remain the same size and shape. With full dynamic lighting, tree shadows will be more detailed and will be able to move around the subject and change shape as the sun moves. Be aware that HDR lighting will also be automatically turned on and cannot be turned off. This mode is a good balance between performance and picture quality and allows you to enjoy the DirectX9 capabilities to some extent. Full Dynamic Lighting– This mode uses full DirectX9 rendering, including full use of dynamic lighting. This can significantly reduce performance on low-end machines due to the use of multiple light sources such as the sun, fires, flashlights, etc. and they will all interact with nature and cast complex shadows that are constantly changing, such as moving light sources. Although this is very realistic in environments with a large number of complex objects or NPCs, it can lead to a serious decrease in FPS. It is recommended to enable this mode only on machines with high-end video cards. Note again that in this HDR mode, lighting is turned on by default and cannot be turned off. It's important that while these lighting settings can impact performance quite a bit, FPS is also dependent on other components of the settings you have enabled. For example, when you turn 1 or more shadow-related settings on or off (sun shadows, grass shadows, shadow quality), this may have a priority impact on dynamic lighting performance. If we assume that you have turned on the Light of NPC flashlights setting, then at night or in underground locations, if there are many NPCs with flashlights hanging around there, this will noticeably reduce the FPS. The Lighting Range setting also affects your FPS when dynamic lighting is running in large open areas. In addition, there is a wide range of advanced options that can help you customize the appearance of lighting in the game. For example, you can use the r2_gi command to enable a more realistic (but seriously FPS-reducing) Global Illumination Method, and you can also adjust the [HDR] appearance using the r2_tonemap_middlegray command; you can adjust the display of glossy surfaces in light using the r2_gloss_factor variable; You can also add motion blur using the r2_mblur command along with the –mblur command line option. See the Advanced Tweaking section for more details on all this. Quality SettingsQuality Settings: You can choose 1 of 5 built-in quality settings in Options: (Minimum, Low, Medium, High, Maximum) which will automatically adjust the Advanced Graphics Settings (presented above) for you accordingly. I don't recommend using these presets as you will get much better results by customizing the advanced settings to best suit your preferences. See the Advanced Settings section for more details. Other settingsPermission: This setting allows you to select the game resolution, number of pixels in length and width. This option is limited depending on your monitor and graphics card combination. The higher resolutions are selected, the more detailed the picture will be, but the worse the performance in the game. If you are running the game on a widescreen monitor, then in order for the player's field of view to be uncropped (FOV, from the English Field Of View, field of view), you need to install patch version 1.0003. Gamma, Contrast, Brightness: These sliders allow you to adjust the brightness and determine the contrast of the image on the screen. They have no impact on performance, so you can set them to suit your taste. Full screen mode: If enabled, the game runs in full screen mode which is recommended for maximum stability. If not selected, the game will run in windowed mode, which can improve performance if a low resolution is selected. Again, windowed mode is strongly discouraged because it can cause problems with resource allocation on the system. Note that if you want to center the game in windowed mode, you can use the -center_screen option (see the page on advanced tweaking). Advanced SettingsThese options will be available when you click the Advanced Settings button at the bottom of the screen. I strongly recommend that you adjust them individually, instead of using the standard Quality Settings presets presented above. Visibility Range: This slider determines the maximum drawing distance of the game world. If you reduce the draw distance, the FPS will increase, due to the fact that the engine will have to render less of the game world. The comparative screenshots above show the real difference between 100% and 50% parameter settings, as a result we see that this slider is not particularly significant. In fact, even by only 25%, a serious difference in draw distance is barely noticeable. The greatest impact is noticeable between 25% and 0% in the slider settings, but at 0% we can observe a fairly serious drop in visibility range. If after a small increase in FPS there is no noticeable serious deterioration in picture quality settings, setting the slider within 25% and 50% is recommended. Please note that any low-lying areas you encounter during the game will not increase your viewing radius when using binoculars. Object detailing: This slider changes the level of Object Detail (LOD, from the English Level Of Detail, level of detail) throughout the game world. If you move the slider to the left, many fewer polygons will be used to construct these objects, which can improve performance. Typically, the only major difference when using a slider is the deterioration in the level of detail of the trees. Trees from a distance will appear as strange looking blobs and will lose their detailed beautiful branches. This can help increase FPS especially on large, spacious levels, but generally the most acceptable definition in this case is a drop in realism. Note that you can change the LOD level using the r2_ssa_lod_a and r2_ssa_lod_b commands - see the section on Advanced Tweaking. Grass Density: This slider determines how densely the grass will be presented in open spaces. Grass can cause a serious drop in FPS when traveling through open areas, as it is located in many of them. Changing the position of the slider from the right position to the 50% mark will reduce the amount of grass, but will still leave a relatively realistic amount of it, all this will give a good increase in FPS. Further reduction of the slider parameters will not bring the expected reduction in grass surface coverage, nor will it give a particularly large increase in FPS. Texture quality: This slider controls the quality of textures used in the game. Textures are images that cover the surface of every object in the game world. The further the slider is moved to the right, the more detailed the texture data will be. Using animated screenshots, you can compare what these detailed textures will look like by following this link. When looking at the detail of the helicopter, pay close attention to the quality of the texture display of the player's hands and the ground in front of him. The main result of using more detailed textures will not have too much of an impact on FPS levels, but may reduce level loading times and stuttering/loading pauses during the game. This is especially true for those video cards that have less than 256 megagrams of video memory. It is important that if you change this setting, in order to see the correct result, you will have to exit and restart Stalker, otherwise there will be no external changes
Texture filtering(Anisotropic Filtering): Anisotropic filtering (AF) is a method of creating clear, straight side lines on the textures of any objects so that they appear normally at a distance. This slider controls the degree of AF used, up to an anisotropic level of 16x. Most modern graphics cards allow you to enable a reasonable level of AF filtering, such as 2x or 4x, which will give you good picture quality without a real drop in FPS. As a rule, the AF slider does not have much impact on the level of picture quality in a game, even if it is set far to the right. It looks like this feature is broken in Stalker. You can also use the r1_tf_mipbias or r2_tf_mipbias variables (depending on the renderer you are using) to increase texture clarity - see the Advanced Tweaking section. Smoothing(Antialiasing): Antialiasing (AA) is a technique for reducing jagged lines in 3D graphics. As a rule, the Stalker engine uses the Deffered Shading rendering method. This explains quite clearly that it cannot support the appropriate level of anti-aliasing that could remove all jagged lines in the game world, regardless of the type of graphics card you use. This slider does not have a significant impact on performance and picture quality. Later, it became possible to enable anti-aliasing in video drivers by replacing the game settings, which gives high-quality results, but also requires video adapter resources. It is also possible to use the r2_aa command, and related commands, instead of this setting, to enable and configure a fake form of blurred AA - see the Advanced Tweaking section. There are many ways to improve the performance of games on a not-so-weak computer. Next, we will look at them in order from simple to complex and tell you what to do if S.T.A.L.K.E.R.: Shadow of Chernobyl is slow. A simple solution to brakes in Stalker
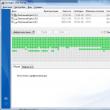
Free up disk spaceBefore proceeding to active actions, you need to make sure that the computer has at least 10-15 GB of free space on the hard drive on which the operating system is installed. This is usually drive "C". This minimum reserve is necessary so that the system can create temporary storage for S.T.A.L.K.E.R.: Shadow of Chernobyl files, caches, and so on without any problems. And make sure you have enough space on your hard drive for the game to run properly. Disable unnecessary programsEach program that runs in the OS takes up a certain percentage of RAM and loads the processor. It’s easy to verify this; just open the task manager using the Ctrl+Alt+Del key combination: If your computer does not have the most powerful processor installed, and the RAM is less than 8-16 GB, then before starting S.T.A.L.K.E.R.: Shadow of Chernobyl you need to disable unnecessary programs. For example, Skype, Discord, Telegram, Google Chrome and so on. Disable overlaysWe are talking about those programs that are able to display their interface on top of the game. Often there are these on your computer - Fraps, Steam, Origin, and so on. Even when the overlay is hidden, it is processed by the computer, reducing FPS in Stalker. Therefore, all overlays must be disabled. This can almost always be done in the program settings without having to uninstall it. For example, the Steam overlay can be easily disabled via the menu: Update video card drivers, download drivers for S.T.A.L.K.E.R.: Shadow of ChernobylRegardless of what video card is in the system unit, its drivers must be kept up to date. Therefore, before launching Stalker, you should go to the manufacturer’s website and check if new drivers have been released: After installing the driver, you should restart your computer to eliminate the possibility of failures. It’s also worth considering that new drivers are no longer available for many older video cards. For some games, video card manufacturers release specially optimized drivers. Look for them in the news section about S.T.A.L.K.E.R.: Shadow of Chernobyl - we usually write about them. You can also look at the website of video card manufacturers.
Change power settingsBy default, the computer is set to a balanced power supply mode, which, and in some laptops, in order to increase operating time, is even set to save energy. This prevents your computer from reaching its full potential in S.T.A.L.K.E.R.: Shadow of Chernobyl, so the first thing you need to do is open the control panel, which can be found by searching. Then you need to do the following:
Enable Nvidia Performance ModeAfter installing the driver for your video card from Nvidia, you can speed up S.T.A.L.K.E.R.: Shadow of Chernobyl using performance mode. This will slightly simplify the graphics in the game, but will increase FPS. Please note that this method is only available if you have a video card with an Nvidia chip. Here's how to do it:
Next, you need to launch S.T.A.L.K.E.R.: Shadow of Chernobyl and make sure that everything is displayed correctly. If problems arise, instead of “Custom settings with emphasis on:”, select “Settings according to the 3D application”. Disable Windows EffectsIf S.T.A.L.K.E.R.: Shadow of Chernobyl does not run in full screen mode, but in a window, including without a frame, then you can increase FPS if you disable Windows effects. To do this you need to do the following:
If necessary, you can select the “Special Effects” option in the last step. In this case, you can independently choose which effects to leave and which to disable. Increase the page file if there is not enough RAM for S.T.A.L.K.E.R.: Shadow of ChernobylTo compensate for the lack of RAM, you can increase the page file. This will allow the system to store some of the data Stalker needs directly on the hard drive. Here's what to do:
For example, if a 4 GB “die” is installed in the system unit, that is, 4192 MB, you need to enter the number 2048 in the fields above. You can make the paging file larger, but this will not give any increase.
It should be understood that the page file is only effective when the system does not have enough RAM. If the computer has 8-16 GB, then the page file is practically not used. And when using an SSD disk as a system drive, the presence of a paging file can completely slow down the performance of S.T.A.L.K.E.R.: Shadow of Chernobyl, so you should not thoughtlessly set a large value for the paging file. To further deteriorate the graphics in S.T.A.L.K.E.R.: Shadow of Chernobyl (potato mode) - turn off anti-aliasing, etc.If Stalker starts, but is very slow, then before starting all procedures you should reduce the graphics to a minimum through the game settings. If this does not help, then you will have to resort to using third-party programs to configure the video card:
After downloading the program, run it. In the case of NVIDIA Inspector, you need to run nvidiaProfileInspector.exe, not nvidiaInspector.exe. At the top, in the “Profiles:” line, you can select any game that is supported by Nvidia drivers. Below are all the available settings. There are many of them, but in order to degrade the graphics in the game to “potato”, just a few, which are located in the “Antialiasing” section, are enough. The greatest performance increase comes from changing these two parameters:
Each of these settings has different meanings. Some of them can make the picture in S.T.A.L.K.E.R.: Shadow of Chernobyl indigestible, so you should try different combinations of values that give a more or less tolerable playable picture. In the case of RadeonMod, everything is similar: you need to find the settings responsible for displaying textures and reduce them until the FPS in the game is high enough. How to overclock a video card for S.T.A.L.K.E.R.: Shadow of ChernobylEverything related to “overclocking” is aimed at increasing performance, but these are quite broad topics that are difficult to talk about in a nutshell. Moreover, this is always quite a risky business. If anything, we've warned you. To achieve higher FPS in S.T.A.L.K.E.R.: Shadow of Chernobyl, you can first try to overclock your video card. The easiest way to do this is to use the built-in software functions from the graphics card manufacturer. For example, some GIGABYTE video cards come bundled with the Graphics Engine program, which contains several ready-made overclocking profiles. This allows you to squeeze 5-10 additional frames per second out of the video card. If there is no program from the manufacturer, then you can always use a universal solution -. This is one of the best overclocking programs, it has many different settings. But here you have to configure everything manually. First of all, you should increase the frequency of the video chip itself (“Core Clock”) and the frequency of the video card memory (“Memory Clock”). On the left are the basic values for these parameters. The temperature and voltage increase are displayed on the right - these characteristics allow you to monitor the “health” of the video card. As the frequency increases, the heating of the video card increases. If the temperature exceeds 85 degrees, then you should increase the fan speed (“Fan Speed”). If the temperature rises to 100 degrees, you should immediately stop overclocking, otherwise the chip may melt. Powerful overclocking requires water cooling, so frequencies should not be increased by more than 10%. Overclock the processorWhile “overclocking” a video card is quite possible right in Windows, in order to improve the performance of the processor and thereby increase the performance of Stalker, you will have to go into the “Bios”. Gaming “overclocking” of a processor usually involves increasing the processor multiplier (Core Ratio). This can be done not on every processor, but only on the one where this multiplier is unlocked. Usually such processors are marked in a special way. For example, Intel uses the markings "K" and "X'. That is, for example, the i7-4790 cannot be overclocked using a multiplier, but the i7-4790K can be overclocked completely. But how can you find out the exact name of the processor model? The easiest way is to use the program. Having launched it, you need to open the “CPU” tab and look at the very first line - “Name”. This is the name of the processor. By the way, you can also see the multiplier itself there. It is in the “Clocks” section, in the “Multiplier” line. If the processor supports overclocking, then this multiplier can be changed. To change the Core Ratio, you must first get into the BIOS shell. To do this, you need to press a special key combination while your computer is booting (before the Windows screen appears). The combination may vary depending on the motherboard. Often the BIOS can be called up using the "F8" or "Del" key. On the Bios screen you need to find the section dedicated to the processor. Here, too, everything is complicated, since the BIOS has many shells. Almost every motherboard manufacturer uses its own, so without knowing English, finding the right place is not so easy. You need to change the multiplier gradually, increasing it by 2. After each change, you should restart the computer and carefully check the performance and temperature of the processor. If it gets above 80 degrees during the game, then you need to immediately turn off S.T.A.L.K.E.R.: Shadow of Chernobyl, restart the computer, go into the BIOS and lower the Core Ratio value. Otherwise the processor may burn out. Currently, the game "Stalker" does not require the player to have a top-end computer configuration, as it was before. Computer hardware has come a long way in its development. Nowadays it is difficult to find a computer with less than 2 GB of memory and a processor with less than two cores. This is exactly what this wonderful game requires. Stalker runs well even on modern integrated video cards. For example, AMD APUs (in which the central processor is combined with several video cores) run “Stalker - Call of Pripyat” well at medium graphics settings in 720p resolution. That is, for a relatively comfortable game you don’t even need a discrete video card! But not all users even have such computers. Many people try to run Stalker on a “calculator” - a computer that is 10 or 15 years old. Also, a large number of stalker addicts play on laptops, which often have a weak processor and are not equipped with a discrete video card. To solve the issue of comfortable gaming on weak computers, we wrote this article. Through the game settings, it is quite possible to increase the average FPS in our favorite game, and using other tricks, you can even run the game on hardware that even theoretically “Stalker” could not run on. First of all, let's look at the game settings, which help us significantly increase FPS (frames per second) without a noticeable decrease in picture quality. Let’s immediately clarify what a weak, medium and strong impact on performance means:
Graphics settings in the game “Stalker - Call of Pripyat” (also applies to two other games in the series):
Below we post information for those who like to delve into the User.ltx configuration file. This file is located in the “My Documents” folder in the saved game directories for Windows 7 and later. The parameters in the list are indicated for the game "Stalker - Clear Sky", although most of the parameters are quite suitable for the other two series of the game. We make all edits using a notepad. After corrections in the User.ltx file, it is not recommended to change settings in the game itself - crashes are possible. Just in case, save the User.ltx file in a safe place; if the game cannot start due to a file editing error, you can easily replace it with the original file. Options that affect graphics come with presets r1_, r2_ or r3_. r1_ starts with options for DX8 game mode (static lighting), r2_ – DX9 (dynamic lighting) and r3_ – DX10 (improved full dynamic lighting). That is, if you play with dynamic lighting and change the r1_* options, this will not have any effect in the game. r1_* parameters (for DirectX 8 mode) r1_dlights r1_dlights_clip This may affect the range of your flashlight. r1_glows_per_frame Setting the number of light sources. Doesn't have much effect on graphics quality or FPS. r1_lmodel_lerp Adjusts the amount of linear interpolation of model lighting. In short, increasing the value will increase the quality of the graphics of some models, for example, your weapons. r1_ssa_lod_a Adjusts the main Level of Detail (LOD), the higher the value, the greater the detail and visibility of objects at a distance, but at the expense of a slight drop in FPS. r1_ssa_lod_b The setting is similar to the previous one, but controls the detailing of some objects on the map. Again, the higher the value, the lower the FPS. r1_tf_mipbias [-0.500 — 0.500] Controls the clarity of textures at a distance. When you decrease the value, the textures will be clearer, but you will have to pay for this with a slight drop in FPS. Increasing the parameter will make the textures blurry, but may slightly increase the FPS. r2_* parameters (for DirectX 9 mode) This option includes the so-called. pseudo-smoothing. This is not true anti-aliasing, but simply blurs the image on the screen a little. If you have an LCD monitor, you can get a similar effect for free by setting the screen resolution to slightly lower than the native one :) When you turn it on, the FPS drops a little. If you enable this option in DX10 mode, it may result in artifacts. r2_aa_kernel Adjusts the amount of pseudo-smoothing. The higher the value, the stronger the blur. A value of 0.300 gives a reasonable amount of blur. r2_aa_break This option controls the distance at which pseudo-smoothing is applied. You can choose the value that is convenient for you, but increasing them does not necessarily mean an increase in quality. For example, a value of r2_aa_break 0.000000,1.000000,0.000000 will give clear indoor spaces and blurry open spaces. r2_aa_weight This parameter is needed for more precise control of the pseudo-smoothing effect. The higher the values, the stronger the blur. r2_allow_r1_lights When this option is enabled, DX8 lighting will be partially used. It seems that productivity should increase, but in reality it may be the other way around... r2_dof This feature adjusts the Depth of Field post-filter value. But still, it is better to change the values of the r2_dof_* options discussed below. r2_dof_far This setting controls the distance at which DoF is turned on. This does not apply to a temporary increase in DoF (when reloading a weapon), but is permanent. Lowering the option from the default value of 600 will increase the blurriness of the image. r2_dof_focus [-10000.000 — 10000.000] The lower the value of this value (by default 1.4), the smaller part of your field of view will be “in focus”. This will be especially noticeable when changing the values of r2_dof_far and r2_dof_near. r2_dof_kernel This option adjusts the overall DoF level. When set to 0, DoF will not be noticeable at all, and higher numbers increase its level. r2_dof_near [-10000.000 — 10000.000] The level of blur of objects close to the player (for example, your gun). The default value is -1.25. r2_dof_sky [-10000.000 — 10000.000] DoF level applied to the sky. The default is 30, and the higher it is, the blurrier the sky. On/off a more realistic lighting method called "Global Illumination" where light can bounce off surfaces and illuminate other surfaces. Enabling this option has a significant impact on performance. The option does not work in the two “Enhanced Full Dynamic Lighting” modes. r2_gi_clip Setting the Global Illumination range. r2_gi_depth Setting shadow depth. r2_gi_photons The option adjusts the level of Global Illumination. Values must be multiples of 8. r2_gi_refl Adjusts the reflective effect of surfaces. r2_gloss_factor The higher the value of this parameter, the more shiny the glossy surfaces are. r2_ls_bloom_fast This option enables Bloom's enhanced form, but does not replace Bloom's HDR. When turned on, the picture will be too bright and blurry, it will have almost no effect on FPS. You do not need to enable this option to use the other r2_ls_bloom_* options. r2_ls_bloom_kernel_b Controls Bloom's blur level; the higher the value, the stronger the flare from light sources. r2_ls_bloom_threshold Adjusts the brightness of Bloom, the higher the value, the lower the brightness of Bloom used in conjunction with HDR. As a result, with a value of 1, the picture will be like on DX8. You can try a value of 0.350 to make the bloom more beautiful. r2_ls_depth_bias [-0.500 — 0.500] Range control for the view of light sources. Low values increase the depth and edge of the source, increasing the parameter can almost completely remove the light sources. The default value is optimal. r2_ls_depth_scale Similar installation to the previous one. r2_ls_squality Setting the quality of shadows. r2_mblur Regulates lubrication during movement. Looks great with a value of 0.1, and this does not affect the FPS. To activate this, it is not enough to change the parameter in the config file, you need to launch the game with the –mblur parameter. Open the properties of the game shortcut, and in the path to the launching executable add –mblur separated by a space. It will look something like this: “D/Supergames/STALKER/XR_3DA.exe” –mblur. The option does not work in the two “Enhanced Full Dynamic Lighting” modes. r2_steep_parallax On off. Parallax Mapping r2_parallax_h This option should control Parallax Mapping, but there are no visual changes observed. r2_slight_fade Setting the lighting distance. r2_ssa_lod_a Adjusts the Level of Detail (LOD) for the game world, the higher the value, the greater the detail and visibility of objects at a distance, but at the expense of a slight drop in FPS. r2_ssa_lod_b The option is similar to the previous one, but controls the detailing of objects. On/off The sun as a light source. If off, trees and houses will not cast shadows. If the option is enabled, you can play with the r2_sun_depth_* parameters r2_sun_depth_far_bias [-0.500 — 0.500] r2_sun_depth_far_scale r2_sun_depth_near_bias [-0.500 — 0.500] r2_sun_depth_near_scale These options control r2_sun if it is enabled. This controls the level of shadow detail and the boundary between sunlight and shadow areas. The default values are optimal. r2_sun_near Controls the quality of sunlight on surfaces close to the player. r2_sun_far Controls the quality of sunlight on surfaces far from the player. r2_sun_details grass shadows r2_sun_lumscale [-1.000 — 3.000] Determines the brightness of the Sun, with values below zero turns off the Sun :). r2_sun_lumscale_amb Adjusts the brightness of objects that are illuminated by the Sun. r2_sun_lumscale_hemi Adjusts the overall brightness of all objects. r2_tf_mipbias [-0.500 — 0.500] Determines how clear textures will be at a distance. When you decrease the value, the textures will be clearer, but you will have to pay for this with a slight drop in FPS. Increasing the parameter will make the textures blurry, but may slightly increase the FPS. Does not work in DX10 mode. r2_tonemap On/off Tone Mapping. Enabling it will improve HDR quality without reducing performance. The following r2_tonemap_* options allow you to customize it. r2_tonemap_adaptation The option specifies the time it takes for vision to adapt to changes in lighting levels. r2_tonemap_lowlum This setting adjusts Tone Mapping in dark areas. The higher this setting, the darker the HDR. r2_tonemap_middlegray This setting has the strongest effect on HDR, and if you turn it up, the HDR effect will be richer. For example, try a value of 1.2 to make the HDR in S.T.A.L.K.E.R. look like it did in Oblivion. r2_exp_donttest_shad Experimental option, enabling untested shaders. Most likely will lead to poor performance or artifacts. r2_soft_particles On off. soft particles. r2_soft_water On off. soft water. r2_ssao st_opt_high Setting up ssao. r2_ssao_blur Blur settings. r2_sun_quality st_opt_high Quality of the sun. r2_sun_shafts st_opt_high The sun's rays greatly affect FPS. Therefore, you can turn them off, the FPS will rise well, and the quality will not drop much. r3_* parameters (for DirectX 10 mode) r3_dynamic_wet_surfaces_far This feature controls the distance at which wet surfaces are visible. The default value is 30, the higher it is, the further away wet surfaces are visible. r3_dynamic_wet_surfaces_near This feature controls the distance at which wet surfaces near the player are visible. The default value is 10, the higher it is, the less detailed wet surfaces close to the player are. r3_dynamic_wet_surfaces_sm_res Setting the resolution of wet surface maps. Initially it costs 256, if you increase it, the quality of these surfaces will increase, but the FPS will decrease. r3_gbuffer_opt On off. special rendering optimization for DX10. Enabling it may increase FPS, but may or may not cause some artifacts :) r3_msaa This is anti-aliasing control in DX10 mode. To save changes you need to restart the game. Options for all modes r__supersample Antialiasing settings. To work in DX10, r3_msa must be enabled along with this option. r__tf_aniso Setting up anisotropic filtering. r__dtex_range Adjusts the distance at which highly detailed textures are visible. The higher the value, the farther they are visible. r__wallmark_ttl The lifetime of effects such as bullet marks, blood, etc. The higher the value, the longer they will stay. r__geometry_lod Level of detail of objects. Larger values correspond to better detail. r__detail_density Grass level of detail. Larger values correspond to better detail. rs_stats When enabled, all technical statistics will be shown on the screen, incl. number of frames per second - FPS. snd_acceleration Enable/disable hardware audio acceleration. snd_cache_size Adjusts how much RAM is used to cache sounds to prevent stuttering. This uses twice as much memory, so if you set it to 16, 32 MB will be used. It is advisable to set the maximum value (32) to prevent the sound from loading during the game. snd_targets The option determines the number of simultaneous sound sources; increasing it negatively affects performance with a weak (read built-in) sound card. On weak audio speakers it is better to limit the value to 24. Setting the screen resolution, here you can set a resolution that is not in the game menu. ai_use_torch_dynamic_lights On/off shadows from objects illuminated by flashlights. g_always_run By default, when you press Forward, the player runs; if you turn this option off, he will walk. ATTENTION!!! THIS MANUAL IS CREATED FOR EXPERIENCED USERS ONLY. Setting up and optimizing S.T.A.L.K.E.R.: Call of Pripyat The first setup method is via Steam Open the library, look for S.T.A.L.K.E.R.: Call of Pripyat, right-click and select properties, then in the section that opens are common, select set launch options, and enter all the commands and their meanings there as described below. Second way Configuration settings in S.T.A.L.K.E.R.: Call of Pripyat stored in a file User.ltx, which is located at \Documents and Settings\All Users\Shared Documents\STALKER-STCOP in Windows XP, or \Users\Public\Documents\STALKER-STCOP on Windows Vista. The file can be opened using Notepad. Make a backup copy before making changes to it. Let's look at some settings from this file. Possible parameter values are written in square brackets. Most of the options are similar to those from S.T.A.L.K.E.R.: Shadow of Chernobyl. All these options can be entered into the console to clearly see the action. Options that affect graphics come with presets r1_, r2_ or r3_. r1_ starts with options for DX8 game mode (Static lighting), r2_ – DX9 (Dynamic lighting) and r3_ – DX10 (Advanced full dynamic lighting). Those. if you play with Dynamic Lighting and change the r1_* options, it will not have any effect in the game. The r2_* parameters have an effect when playing in DirectX 10 mode. After editing the User.ltx file, it is not advisable to change the settings in the game menu; this can reset all changes in the config file. r1_* parameters (for DirectX 8 mode) r1_dlights r1_dlights_clip r1_glows_per_frame r1_lmodel_lerp r1_ssa_lod_a r1_ssa_lod_b r1_tf_mipbias [-0.500 - 0.500] r2_* parameters (for DirectX 9 mode, part 1) r2_aa r2_aa_kernel r2_aa_break r2_aa_weight r2_allow_r1_lights r2_dof r2_dof_far r2_dof_focus [-10000.000 - 10000.000] r2_dof_kernel r2_dof_near [-10000.000 - 10000.000] r2_dof_sky [-10000.000 - 10000.000] r2_gi r2_gi_clip r2_gi_depth r2_gi_photons r2_gi_refl r2_gloss_factor r2_ls_bloom_fast r2_ls_bloom_kernel_b r2_ls_bloom_threshold r2_ls_depth_bias [-0.500 - 0.500] r2_ls_depth_scale r2_ls_squality r2_mblur r2_steep_parallax r2_parallax_h r2_slight_fade r2_ssa_lod_a r2_ssa_lod_b r2_* parameters (for DirectX 9 mode, part 2) r2_sun r2_sun_depth_far_bias [-0.500 - 0.500] r2_sun_near r2_sun_far r2_sun_details r2_sun_lumscale [-1.000 - 3.000] r2_sun_lumscale_amb r2_sun_lumscale_hemi r2_tf_mipbias [-0.500 - 0.500] r2_tonemap r2_tonemap_adaptation r2_tonemap_lowlum r2_tonemap_middlegray r2_exp_donttest_shad r2_soft_particles r2_soft_water r2_ssao st_opt_high r2_ssao_blur r2_sun_quality st_opt_high r2_sun_shafts st_opt_high r3_* parameters (for DirectX 10 mode) r3_dynamic_wet_surfaces_far r3_dynamic_wet_surfaces_near r3_dynamic_wet_surfaces_sm_res r3_gbuffer_opt r3_msaa Options for all modes r__supersample r__tf_aniso r__dtex_range r__wallmark_ttl r__geometry_lod r__detail_density rs_stats snd_acceleration snd_cache_size snd_targets vid_mode ai_use_torch_dynamic_lights g_always_run texture_lod rs_v_sync rs_vis_distance Command Line Options There are additional commands that are executed through the game launch command line. Right-click on the shortcut, select Properties, then add commands in the path to the object, separated by a space, or through the Steam launch properties (I described this method at the very beginning) -center_screen– Centers the game window in windowed mode. -dsound– Uses DirectSound audio instead of OpenAL. -gpu_nopure– Switches the full hardware acceleration of the video card to incomplete. This will not improve performance on new cards. -gpu_ref– Switches the video card mode to the default mode -gpu_sw– Completely disables hardware acceleration of the video card. Not recommended. -load[your save] – Loading a specific save immediately after starting the game. -ltx– Loads and executes a specific configuration file “filename.ltx”. For example, you can create your own config file instead of User.ltx, and run it with this command. -nodistort– Removes distortion effects: air from a fire, anomalies. This may help owners of old video cards. -nolog– Disables log -noprefetch– Disables prefetch. The game will load faster, but there may be sharp drops in FPS in the game. -noshadows– Disables shadows from dynamic light sources (the Sun does not count), increases FPS. -nosound– Disables all sound in the game -overlay[path to folder] – Specifying the path to another folder with saves/configs/profiles. -psp– Enables third-person view. -smap1536, -smap2048, -smap2560, -smap3072, -smap4096– These commands set the resolution of shadow maps. The higher it is, the more beautiful the shadows and the lower the FPS. You can only use one of these commands! -ss_tga– Screenshots will be taken in .TGA format with higher quality. "Configuring and optimizing STALKER through a file." * Configuration settings in S.T.A.L.K.E.R. stored in a file User.ltx, which is located at \Documents and Settings\All Users\Shared Documents\STALKER-SHOC in Windows XP, or Users\Public\Documents\STALKER-SHOC in Windows Vista. The file can be opened using Notepad. Make a backup copy before making changes to it. Let's look at some settings from this file. Possible parameter values are written in square brackets. * The following options with the r1_ prefixes refer to the operating mode of S.T.A.L.K.E.R. in DX8 mode, in the game menu it is called Static Lighting. Options r2_ - to DX9 mode, which is called the Dynamic Lighting game. * DX8 options will go first. If you are using DX9, changing these options will do nothing. r1_dlights– enable/disable dynamic lighting in DX8. A strange option, because DX8 already implies turning off dynamic lighting. This may be removing the light source of your flashlight. r1_dlights_clip– dynamic lighting distance when static lighting is activated... A strange option, because with DX8 dynamic lighting is not used at all. This may affect the illumination range of your flashlight. r1_glows_per_frame– Setting the number of light sources. Affects the quality of graphics and FPS. r1_lmodel_lerp– adjusts the amount of linear interpolation of model lighting. In short, increasing the value will increase the quality of the graphics of some models, for example, your weapons. r1_ssa_lod_a— Adjusts the main Level of Detail (LOD), the higher the value, the greater the detail and visibility of objects at a distance, but at the expense of a slight drop in FPS. r1_ssa_lod_b– The setting is similar to the previous one, but controls the detailing of some objects within the game world. Again, the higher the value, the lower the FPS. r1_tf_mipbias [-0.500 — 0.500]– Controls the clarity of textures at a distance. When you decrease the value, the textures will be clearer, but you will have to pay for this with a slight drop in FPS. Increasing the parameter will make the textures blurry, but may slightly increase the FPS. Before patch 1.0004 was installed, it was possible to change this value between -3.000 and 3.000. Now DX9 options. If you are using DX8, changing these options will do nothing. r2_gi– On/off is a more realistic lighting method where light can bounce off surfaces and illuminate other surfaces. Enabling this option has a significant impact on performance. r2_gi_refl– Adjusts the reflective effect of surfaces when the previous option is enabled. r2_aa– This option enables pseudo-smoothing. This is not true anti-aliasing, but simply blurs the image on the screen a little. If you have an LCD monitor, you can get a similar effect for free by setting the screen resolution to a different one from the native one :). When you turn it on, the FPS drops slightly. r2_aa_kernel– Adjusts the amount of pseudo-smoothing. The higher the value, the stronger the blur. r2_aa_break– This option controls the distance at which pseudo-smoothing is applied. You can choose the value that is convenient for you. For example, a value of r2_aa_break 0.000000,1.000000,0.000000 will give clear indoor spaces and blurry open spaces. r2_aa_weight– This parameter is needed for more precise control of the pseudo-smoothing effect. The higher the values, the stronger the blur. r2_allow_r1_lights– When this option is enabled, DX8 lighting will be partially used. It seems that productivity should increase, but in reality it may be the other way around... r2_gloss_factor– The higher the value of this parameter, the more shiny the glossy surfaces are. r2_ls_bloom_fast– Enhances the HDR effect, which can lead to the picture being too bright and blurry; it has almost no effect on FPS. But it's to taste... r2_ls_bloom_kernel_b– controls the level of HDR blur; the higher the value, the more blurred the picture is. r2_ls_bloom_threshold– Adjusts the brightness of HDR, the higher the value, the lower the brightness of HDR. As a result, with a value of 1, the picture will be like on DX8 with bloom. r2_ls_depth_bias [-0.500 — 0.500]– Range control for the view of light sources. Low values increase the depth and edge of the source, increasing the parameter can almost completely remove the light sources. r2_ls_depth_scale– Similar to the previous installation. r2_mblur– regulates lubrication during movement. Looks great with a value of 0.1, and this does not affect the FPS. To activate this, it is not enough to change the parameter in the config file, you need to launch the game with the –mblur parameter. Open the properties of the game shortcut, and in the path to the launching executable add –mblur separated by a space. It will look something like this: D/Supergames/STALKER/XR_3DA.exe -mblur r2_parallax_h– This option should control Parallax Mapping, but no visual changes are observed. However, setting the value to 0.04 may increase FPS. r2_slight_fade– By raising this value you can improve FPS. r2_ssa_lod_a— Adjusts the Level of Detail (LOD) for the game world, the higher the value, the greater the detail and visibility of objects at a distance, but at the expense of a slight drop in FPS. r2_ssa_lod_b– The option is similar to the previous one, but controls the detailing of objects. r2_sun– On/off The sun as a light source. If off, trees and houses will not cast shadows. r2_sun_depth_far_bias [-0.500 — 0.500] r2_sun_depth_far_scale r2_sun_depth_near_bias [-0.500 — 0.500] r2_sun_depth_near_scale These options control r2_sun if it is enabled. This is essentially controlling the level of shadow detail and the boundary of sunlight and shadow areas. r2_sun_details– Grass shadows r2_sun_lumscale [-1.000 — 3.000]– Determines the brightness of sunlight, turning off the Sun with values below zero :). r2_sun_lumscale_amb– regulates the brightness of the surrounding world, does not affect the brightness of sunlight. r2_tf_mipbias [-0.500 — 0.500]– Determines how clear textures will be at a distance. . When you decrease the value, the textures will be clearer, but you will have to pay for this with a slight drop in FPS. Increasing the parameter will make the textures blurry, but may slightly increase the FPS. Before patch 1.0004 was installed, it was possible to change this value between -3.000 and 3.000. r2_tonemap– On/off Tone Mapping. Enabling it will improve HDR quality without reducing performance. The following r2_tonemap_ options allow you to customize it. r2_tonemap_lowlum— This setting adjusts Tone Mapping in dark areas. The higher this setting, the darker the HDR. r2_tonemap_middlegray- This setting has the strongest effect on HDR, and if you turn it up, the HDR effect will be richer. For example, try a value of 1.2 to make the HDR in S.T.A.L.K.E.R. look like it did in Oblivion. * General settings. Works in both DX9 and DX8. ai_use_torch_dynamic_lights– On/off shadows from objects illuminated by flashlights. g_always_run– by default, when you press Forward, the Marked One runs; if this option is turned off, he will walk. Do not confuse this with Sprint, when the Marked One runs very quickly, wasting energy. rs_stats— On/off statistics, including FPS display. snd_acceleration— On/off hardware audio acceleration snd_cache_size– Adjusts how much RAM is used to cache sounds to prevent stuttering. This uses twice as much memory, so if you set it to 16, 32 MB will be used. snd_targets– The option determines the number of simultaneous sound sources; increasing it affects performance with a weak (read-built-in) sound card. vid_mode— Setting screen resolution texture_lod— Level of detail of removed textures. The lower the value, the better the textures. r__geometry_lod— Level of detail of objects. Smaller values correspond to better detail. rs_v_sync— Vertical synchronization. I recommend turning this off. * Command line options. There are additional commands that are executed through the game launch command line. Right-click on the shortcut, select Properties, then add commands in the path to the object. For example, like this: C:\Program Files\THQ\S.T.A.L.K.E.R. — Shadow of Chernobyl\bin\XR_3DA.exe -nointro -noprefetch -noshadows. *Now I will list some important commands. -center_screen— Centers the game window in windowed mode. -dsound- Uses DirectSound sound instead of OpenAL. -gpu_nopure– Switches Pure Hardware mode of the video card to simple Hardware mode. This will not improve performance on new cards. -gpu_ref— Switches the video card mode to the default mode -gpu_sw— Switches the video card mode to Software mode -load [your save]– Loading a specific save immediately after starting the game. -ltx- Loads and executes a specific configuration file “filename.ltx”. -nodistort– Removes distortion effects: air from a fire, anomalies. This may help owners of old video cards. -nointro– Does not show intro videos, the menu loads immediately -nolog– Disables log -noprefetch– Disables prefetch. The game will load faster, but there may be sharp drops in FPS in the game. -noshadows– Disables shadows from dynamic light sources (the Sun does not count), increases FPS. -nosound– Disables all sound in the game -overlay [path to folder]– Specifying the path to another folder with saves/configs/profiles -psp– Includes third person view -smap1536 -smap2048 -smap4096 * These commands set the resolution of shadow maps. The higher it is, the more beautiful the shadows and the lower the FPS. -ss_tga– Screenshots will be taken in .TGA format with higher quality |


| Read: |
|---|
New
- How to put an accent on a letter in Word
- How to convert images to PNG format?
- Technical problems and their solutions v
- Bioshock remastered won't start
- How to set your melody to the desired contact on a Nokia X2 smartphone with two SIM cards
- Free programs for Windows download for free
- How to burn any ISO image to a USB flash drive
- Calls from unknown numbers
- I forgot my Google account password and when I log in I get the message you entered the wrong password.
- The network adapter does not have valid IP settings - solving the problem


